


Scenic view captured by Renogy user John Coney during an RV adventure.
This guide to solar camping systems in the USA covers the practical side of things: how to size a system for your actual needs, what the real costs look like in 2026, and how to set everything up without frying your electronics or overspending.
If you've been staring at spec sheets wondering whether 100 watts is enough or if you really need lithium iron phosphate batteries, you're in the right place. The goal here is to help you buy the right gear once, set it up correctly, and stop worrying about power when you should be enjoying the trip.
Essentials of Solar Camping in the USA
Solar camping has become cheaper, lighter, and more efficient in recent years. However, the basics remain the same: you need panels to catch sunlight, a controller to manage the flow, a battery for storage, and an inverter to power standard plug-in devices.
Today, you can choose between different setups. Weekend campers often prefer "portable power stations," which combine several parts into one easy-to-carry box. If you live in an RV or stay off-grid for long periods, a permanent system with fixed panels and a larger battery bank is better.

Renogy user Julio Cesar Berrondo using an N-Type Solar Panel by the lake.
Types of Solar Systems: Solar Suitcase, Solar Blankets, Fixed Panels and Bifacial
| Type | What It Is | Common Materials | How It's Used | Key Advantages | Best For | Limitations |
|---|---|---|---|---|---|---|
| Solar Suitcase | Foldable rigid solar panels connected by hinges and designed for easy transport. | Monocrystalline cells, aluminum frame, tempered glass. | Unfold at camp, aim toward the sun, connect to a battery or portable power station. | • High efficiency • Quick setup • Better charging performance than flexible panels |
• Car camping • Overlanding • Weekend camping trips |
• Heavier than blankets • Requires setup and storage space |
| Solar Blanket | Lightweight, foldable solar panels designed for maximum portability. | Flexible monocrystalline or thin-film cells with fabric backing. | Lay flat on the ground, tent, vehicle, or hang in direct sunlight. | • Lightweight • Compact storage • Easy to pack and carry |
• Backpacking • Tent camping • Weight-sensitive travel |
• Lower efficiency • More susceptible to wear • Usually higher cost per watt |
| Fixed Panels | Permanently mounted solar panels installed on RVs, trailers, vans, or overland vehicles. | Rigid monocrystalline or polycrystalline panels. | Connected to a charge controller, battery bank, and electrical system for automatic charging. | • Always charging while traveling • No setup at camp • Supports larger power needs |
• RV living • Van life • Full-time off-grid travel |
• Higher upfront cost • Permanent installation required • Cannot be repositioned to avoid shade |
| Bifacial Panels | Solar panels that generate power from both the front and rear sides by capturing reflected sunlight. | Monocrystalline cells, transparent backsheet or dual-glass construction, aluminum frame. | Portable or fixed installation. Perform best when mounted above reflective surfaces such as sand, gravel, concrete, or light-colored ground. | • Higher energy yield than traditional panels • Better performance in reflective environments • Improved efficiency per panel |
• RV camping • Overlanding • Off-grid cabins • Desert, beach, snow, and open-field camping |
• Higher upfront cost • Rear-side gains depend on ground reflectivity and mounting height • Benefits are reduced when laid flat on dark surfaces |
Quick Recommendation:
- Choose a Solar Blanket if packability and low weight are your top priorities.
- Choose a Solar Suitcase if you want the best balance of portability, efficiency, and charging speed.
- Choose Fixed Panels if you camp frequently, travel in an RV or van, and want hands-free power generation every day.
- Choose Bifacial Panels if you have limited installation space and want the highest possible energy output per panel. They are ideal for RVs, overland vehicles, and off-grid camping setups where every watt matters.
Sizing Your Solar Setup for Energy Needs
Getting the size right is the single most important decision you'll make. Undersized systems leave you rationing power. Oversized systems waste money and add unnecessary weight. The sweet spot comes from understanding three variables: how much energy you consume, how much your battery can store, and how much sunlight your location actually provides.
Calculating Daily Watt-Hour Consumption
Start by listing every device you plan to power and how long you'll use it each day. Multiply each device's wattage by its hours of use to get watt-hours (Wh).
Here's a realistic example for a couple on a car camping trip:
-
Phone charging (2 phones): 10W x 3 hours = 30 Wh
-
LED camp lights: 10W x 5 hours = 50 Wh
-
Laptop: 50W x 2 hours = 100 Wh
-
12V portable fridge: 50W average draw x 24 hours = roughly 600 Wh (compressor cycles on and off, so actual draw averages around 25-35W, yielding about 600-840 Wh)
-
Camera battery charging: 15W x 2 hours = 30 Wh
Total daily consumption in this scenario: roughly 810-1,050 Wh. That fridge is the big one. If you're not running a fridge, your needs drop dramatically, often to under 300 Wh per day.
Write your own list before buying anything. Real numbers beat guesses every time.
Matching Battery Capacity to Solar Input
Your battery needs to store enough energy to cover at least one full day of consumption, ideally a bit more to account for cloudy days. For the example above, a battery bank of around 1,000 Wh is a reasonable minimum.
Lithium iron phosphate (LiFePO4) batteries dominate the camping market in 2026 for good reason: they're lighter than lead-acid, tolerate deep discharges (you can safely use 80-90% of their capacity), last 2,000+ cycles, and handle temperature extremes well. A 100Ah 12V LiFePO4 battery provides about 1,280 Wh of total capacity and roughly 1,000-1,150 Wh of usable energy.
Your solar input needs to replenish what you use. If you consume 1,000 Wh per day and get 5 peak sun hours, you need 200W of panels (200W x 5 hours = 1,000 Wh). In practice, you'll lose 15-25% to inefficiencies in the charge controller, wiring, and panel temperature, so bumping up to 250W of panels gives you a comfortable margin.
Factoring in Peak Sun Hours Across US Regions
Peak sun hours (PSH) represent the number of hours per day when solar irradiance averages 1,000 watts per square meter. This varies dramatically across the US.
-
Southwest desert (Arizona, Nevada, Southern California): 6-7.5 PSH in summer, 4-5 in winter
-
Mountain West (Colorado, Utah, New Mexico): 5.5-7 PSH in summer, 3.5-4.5 in winter
-
Southeast (Florida, Georgia, Carolinas): 4.5-6 PSH in summer, 3-4 in winter
-
Midwest (Michigan, Wisconsin, Minnesota): 4.5-5.5 PSH in summer, 2-3 in winter
-
Pacific Northwest (Oregon, Washington): 4-5.5 PSH in summer, 1.5-2.5 in winter
If you camp primarily in the Southwest, you can get away with smaller panels. If you're in the Pacific Northwest during shoulder season, you'll want to oversize your array or carry a backup charging method. The National Renewable Energy Laboratory's PVWatts tool gives precise PSH data for any US zip code and is free to use.
How Many Solar Panels Do I Need for Camping?
How to calculate how many solar panels you need is the question everyone asks, and the honest answer is: it depends entirely on your consumption and location. But here are some practical benchmarks based on common camping styles in 2026.
| Camping Style | Daily Energy Use | Typical Devices Supported | Recommended Solar Setup | Recommended Battery Storage |
|---|---|---|---|---|
| Minimalist Camping | Under 200Wh/day | • Smartphones • LED lights • Bluetooth speaker • GPS devices • Smartwatches |
• 100W Anti-Shading Solar Panel • Portable charge controller (if needed) |
• 500Wh portable power station • Or 40–50Ah LiFePO4 battery |
| Weekend Camping | 400–600Wh/day | • Laptop • Camera batteries • Drone batteries • Phones and tablets • LED lighting |
• 200W solar panel system • Two 100W suitcase panels or one 200W foldable panel |
• 1,000Wh power station • Or 80–100Ah LiFePO4 battery |
| Comfort Camping | 800–1,200Wh/day | • 12V refrigerator • Laptop and electronics • Fans • Lighting • Water pump |
• 300–400W solar array • Portable panels or fixed RV roof panels |
• 1,200–2,000Wh battery bank • Or 100–150Ah LiFePO4 battery |
| RV & Overland Living | 2,000Wh+/day | • Air conditioner (limited runtime) • Microwave • Residential refrigerator • Coffee maker • TVs and multiple devices |
• 600–1,200W fixed solar array • MPPT charge controller • Pure sine wave inverter |
• 200–400Ah LiFePO4 battery bank • Or 2,500–5,000Wh+ energy storage system |
Quick Tip: If you're unsure which size to choose, estimate your daily power consumption first. For most weekend campers, a 200W solar panel and 1,000Wh battery provide the best balance of portability, cost, and energy independence.
And don't forget, tools like the Renogy solar panel calculator are there to guide you through this process, making it even more straightforward.
What Can a Solar Camping System Power?
A common misconception is that solar camping means sacrificing comfort. A properly sized system can run quite a bit. The key is understanding the difference between low-draw and high-draw devices.
| Device Type | Typical Power Draw | Common Examples | Recommended System Size |
|---|---|---|---|
| Low-Draw Devices | 5–60W | • LED lights • Smartphones & tablets • Bluetooth speakers • Laptops • Camera batteries • GPS units • Ham radios • 12V fans |
100–200W solar panel 500–1,000Wh battery |
| Medium-Draw Devices | 60–300W | • 12V compressor fridge • CPAP machine • Electric blanket • Small TV • Starlink (standard use) |
200–400W solar panel 1,000–2,000Wh battery |
| High-Draw Devices | 1,000–1,800W+ | • Hair dryer • Microwave • Electric kettle • Coffee maker • Space heater |
600W+ solar array Large battery bank Pure sine wave inverter |
| Extreme-Draw Devices | 1,500–3,500W+ | • RV air conditioner • Portable AC unit • Electric water heater • Residential appliances |
1,000W+ solar array 400Ah+ LiFePO4 battery bank High-capacity inverter |
Rule of Thumb: Solar camping systems are ideal for electronics, lighting, refrigeration, and other low-to-medium power devices. Appliances that generate heat or cooling—such as microwaves, kettles, heaters, and air conditioners—require significantly larger solar arrays and battery banks.
What Is the Best Solar Camping System for RV Camping?
RV camping offers the best platform for solar because you have roof space, don't need to carry panels by hand, and typically stay in one spot long enough to harvest serious energy. The "best" system depends on your RV size and habits, but a strong general recommendation for 2026 is a setup built around 400W of rigid monocrystalline roof panels, a 200Ah LiFePO4 battery bank, a 40A MPPT charge controller, and a 2,000W pure sine wave inverter.
This configuration provides roughly 1,600-2,400 Wh of solar harvest per day depending on location, enough to run a residential fridge, charge all personal devices, power LED lights, run a TV, and operate a CPAP machine overnight.
A Complete RV Solar Kit for Easy DIY Installation
If you'd rather spend time enjoying your RV than sourcing and matching components, a complete all-in-one solar kit can simplify the entire process. Instead of dealing with compatibility issues, wiring confusion, and missing parts, a complete solution gives you everything you need in one package.
Renogy offers flexible system sizes to match different energy needs, including 1.28kWh, 2.56kWh, 3.84kWh, 5.12kWh, and 7.68kWh configurations. Let's take Go Further 7.6kWh RV Solar Kit as an example.
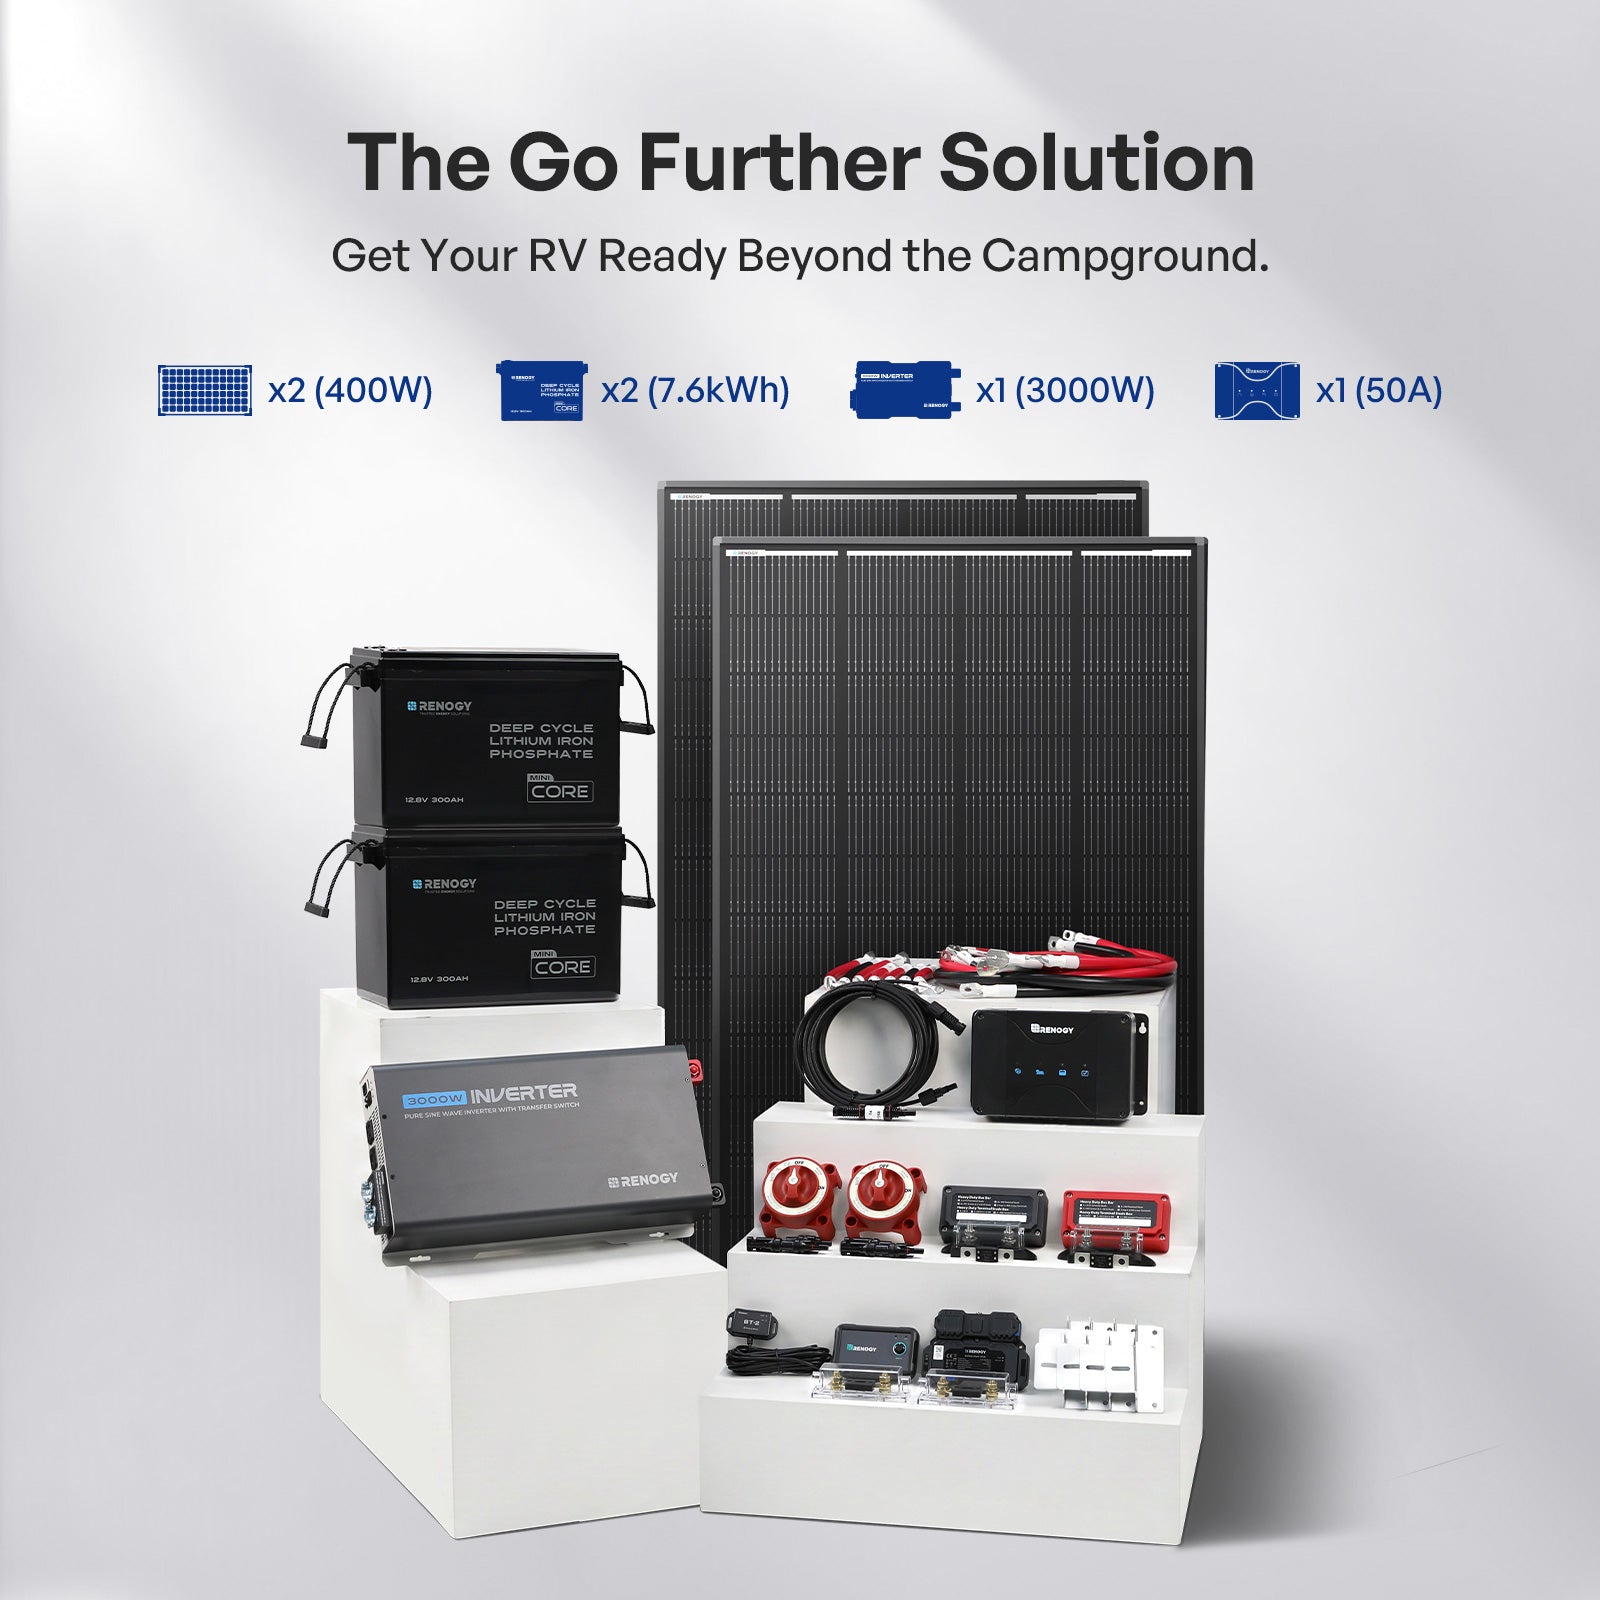
- Complete system in one kit (no missing parts)
- Detailed wiring diagrams and step-by-step guides
- Pre-matched components with full compatibility
- Bluetooth monitoring with mobile app control
- Flexible configurations for RV and home use
- Reliable warranty and after-sales support
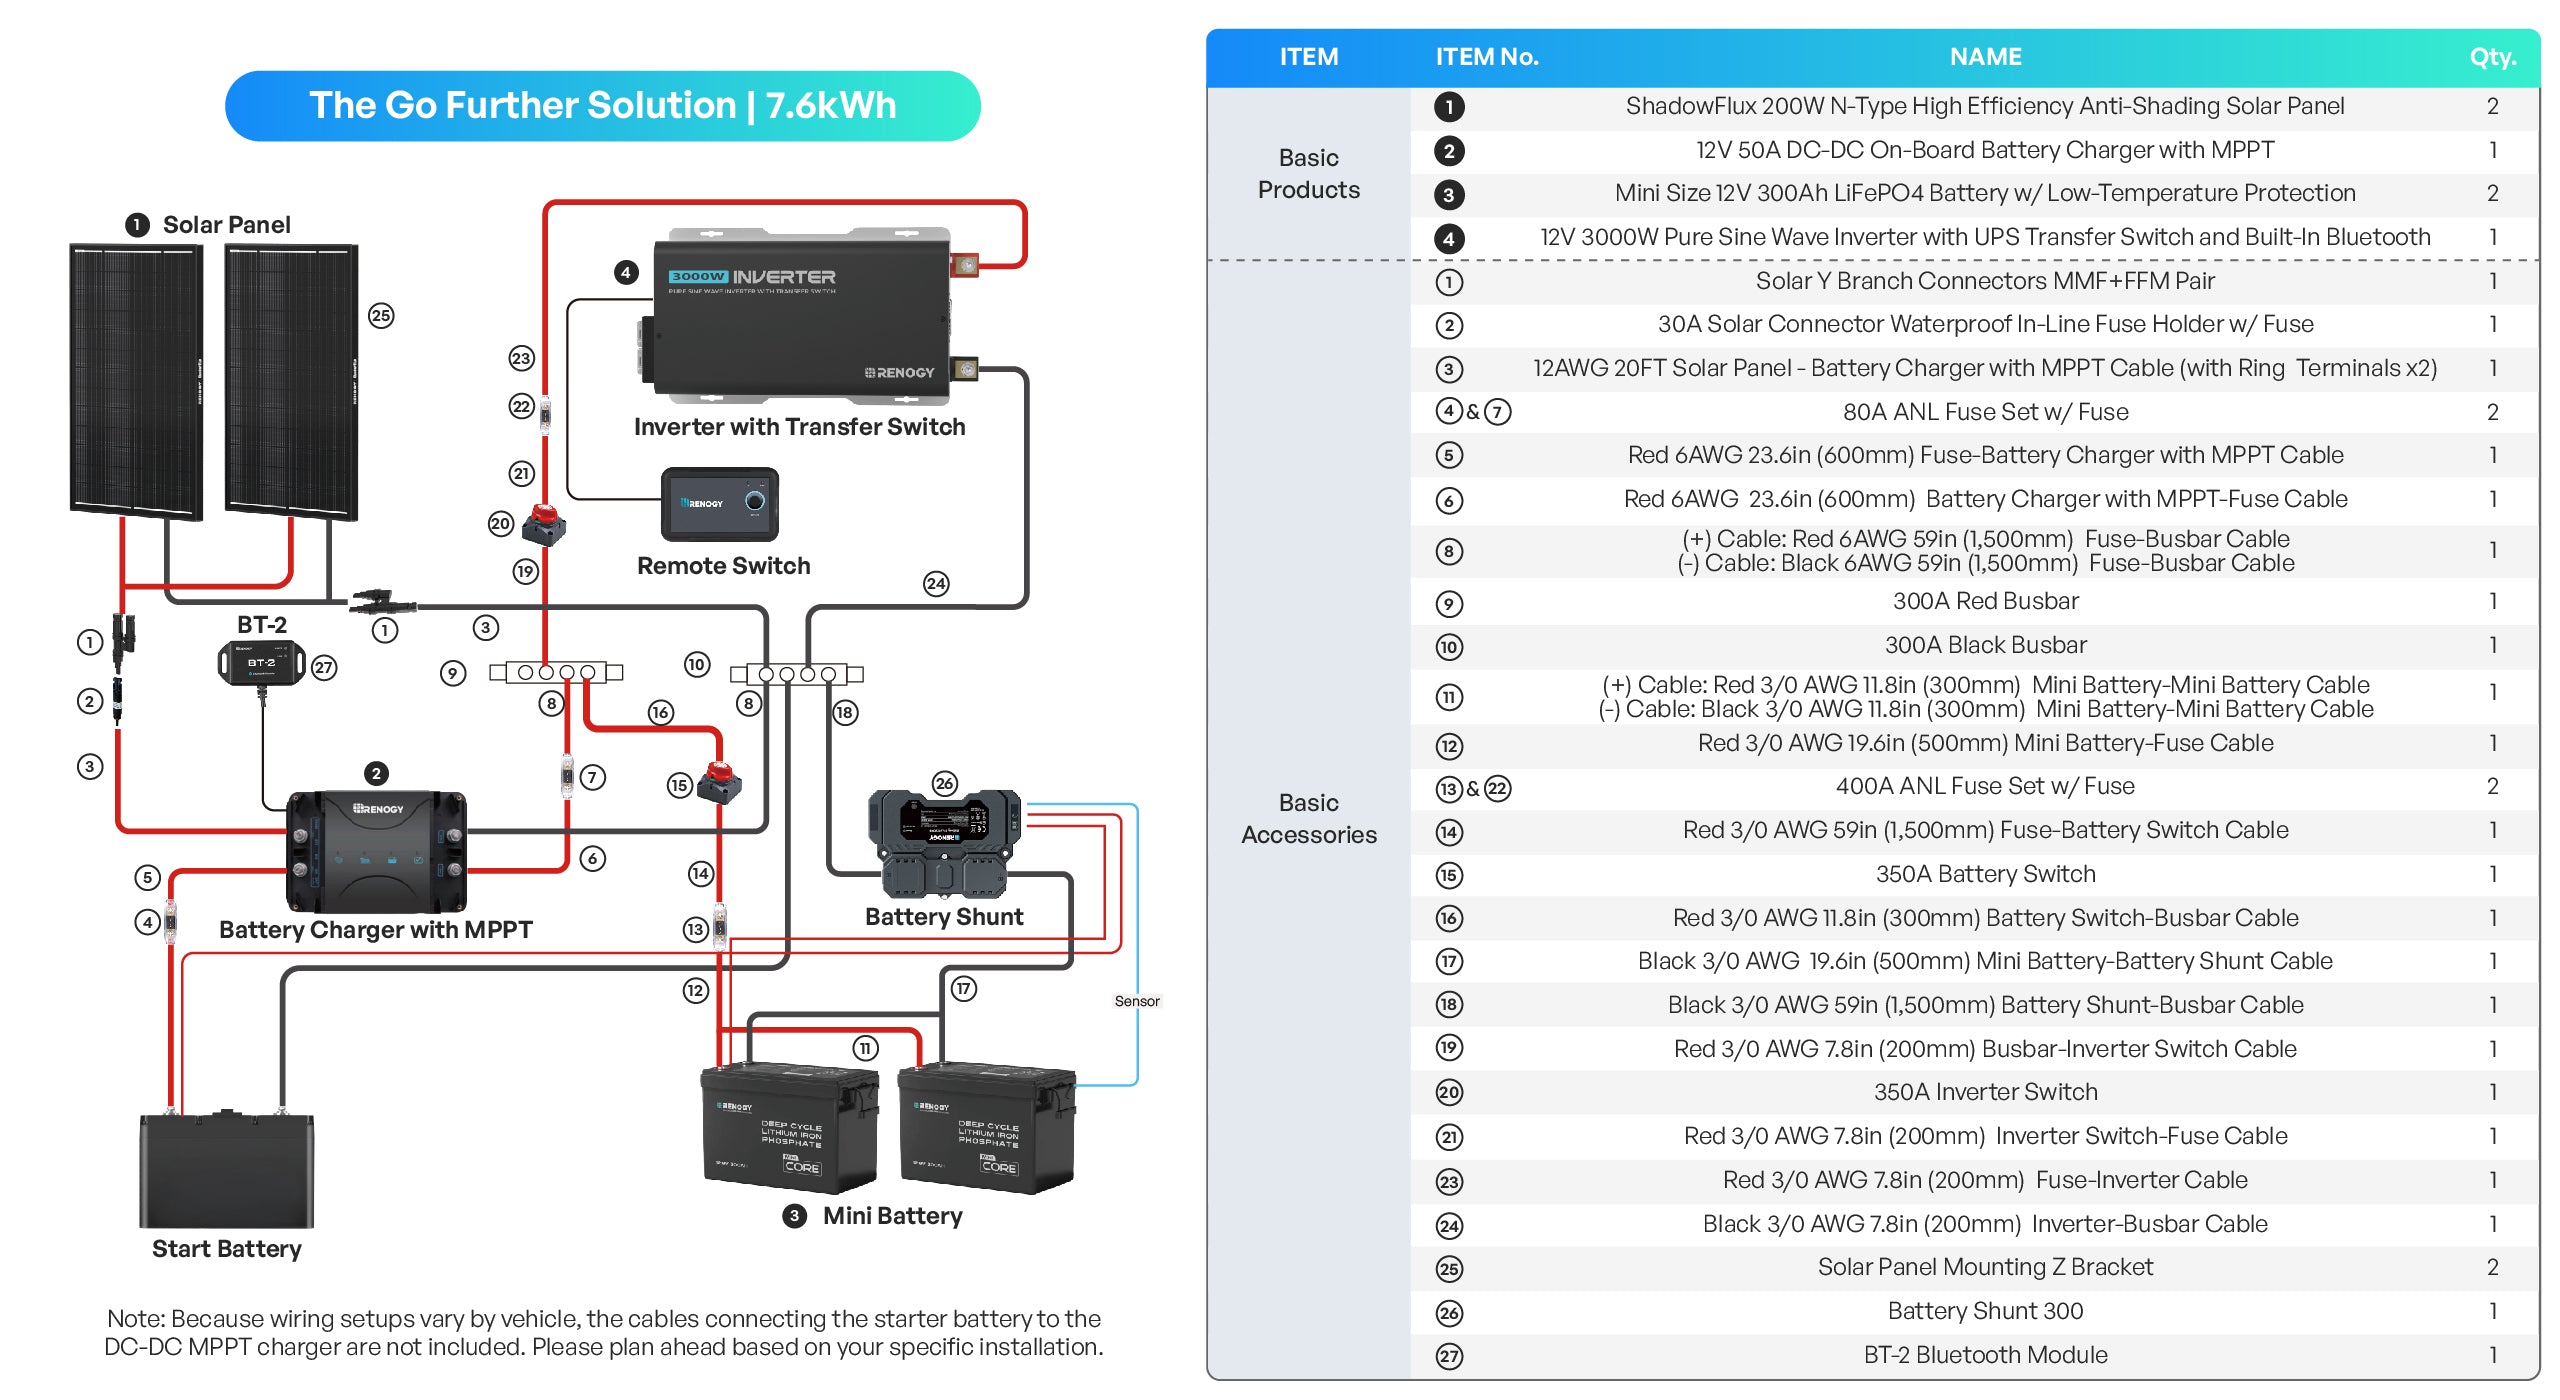
Designed for DIY users, the kit comes with step-by-step installation guidance so you can assemble the system with confidence. Whether you're upgrading an existing RV or building a new off-grid setup, it's a practical way to get reliable solar power without spending hours researching, selecting, and configuring individual components. If you need help along the way, Renogy's support team is available to assist with installation and setup questions.
If you're interested in biulding your own solar system for camping, check out the Go Far 3.8kWh & Go Further 7.6kWh Launch Overview presented by Renogy Product Specialist Kade, who walks through the system design, key components, and installation considerations in detail.
Connecting Panels to Charge Controllers
The charge controller sits between your panels and your battery, regulating voltage and current to prevent overcharging. You have two types: PWM (pulse width modulation) and MPPT (maximum power point tracking).
MPPT controllers cost more but harvest 15-30% more energy than PWM controllers, especially in cooler temperatures or when panels operate at voltages significantly above battery voltage. For any system over 200W, MPPT is worth the extra cost. Popular choices include the Victron SmartSolar series and the Renogy Rover line.
When wiring multiple panels, you can wire them in series (increases voltage) or parallel (increases amperage). Series wiring is generally preferred for MPPT controllers because higher voltage means lower current and less voltage drop over long wire runs. However, series wiring means shade on one panel affects the entire string. If partial shading is common at your campsites, parallel wiring or using panels with built-in bypass diodes reduces this problem.
Safe Battery Integration and Inverter Setup
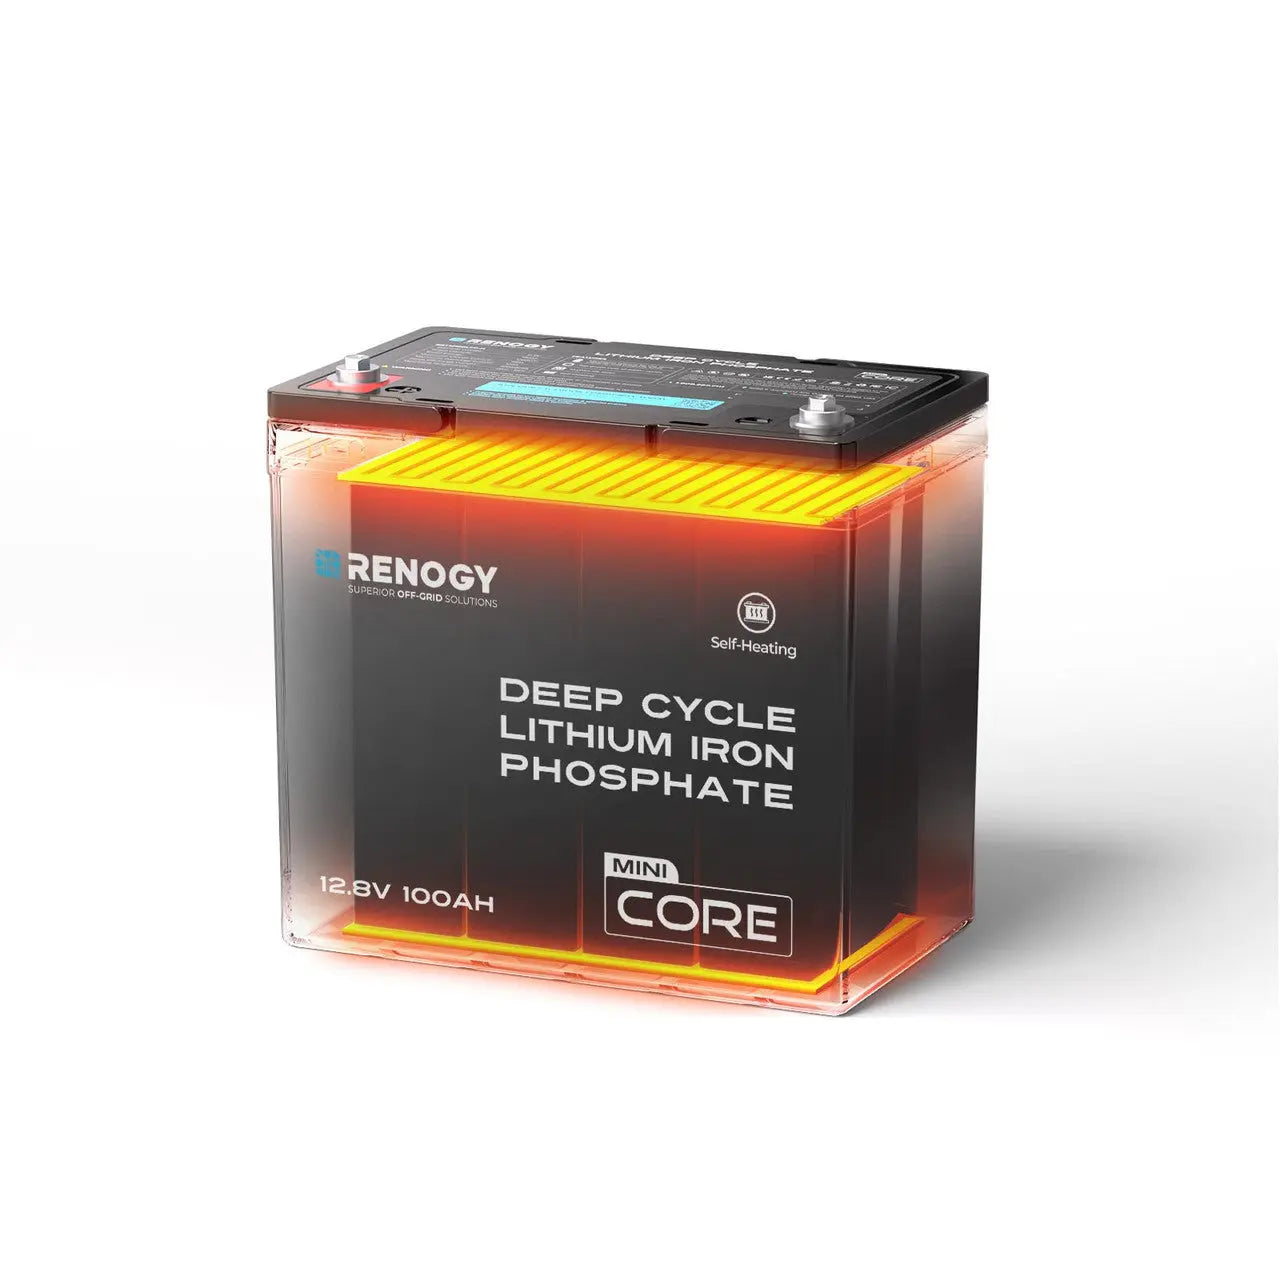
Battery installation requires attention to a few critical details. Mount LiFePO4 batteries in a ventilated compartment, ideally inside the RV where temperatures stay moderate. While LiFePO4 batteries don't off-gas like lead-acid, they do have a minimum charging temperature: most won't accept a charge below 32°F (0°C). Some models include built-in heating elements that solve this, which is worth the premium if you camp in cold weather.
Your inverter converts 12V DC battery power to 120V AC for standard household outlets. Pure sine wave inverters are essential for sensitive electronics like laptops, CPAP machines, and anything with a motor. Modified sine wave inverters are cheaper but can damage some devices and cause buzzing in audio equipment.
Size your inverter to handle your largest single load plus a 20% margin. If your biggest draw is a 1,200W microwave, get at least a 1,500W inverter. Use appropriately sized cables between the battery and inverter: undersized wiring creates heat, voltage drop, and fire risk. For a 2,000W inverter on a 12V system, you'll need 4/0 AWG cables for runs over a few feet.
Making the Right Choice
The best solar camping system is the one that matches your actual habits, not the one with the most impressive spec sheet. Start by honestly calculating your daily energy use, check the peak sun hours for the regions where you camp most, and size your panels and battery accordingly. Build in a 20-30% margin for inefficiencies and cloudy days.
If you're new to solar camping, start with a portable power station and a foldable panel. Use it for a few trips, track what you actually consume, and then decide if you need to scale up. This approach costs less upfront and gives you real data instead of guesses.


