


Have you ever received a solar kit and not known where to start? Wiring a campervan solar system is arguably the most intimidating part of any DIY build. It's technical, it's heavy, and there is absolutely zero room for error. One reversed polarity connection can fry a charger. A loose ground wire can create a shock hazard. The stakes are high.
This is precisely why the Renogy RV Solution Wiring Guides, specifically for the new 3.8kWh Go Far and 7.6kWh Go Further kits, deserve more credit than they usually get. Most people treat manuals as an afterthought, but Renogy has treated these documents as an integral part of the product. They aren't just stapled sheets of paper, they are a structured technical companion, a wiring bible, and a safety coach rolled into one.
Let's open the book and see what makes these guides so much more than just instructions.
System Wiring Overview
The biggest mistake a beginner makes is trying to wire things component-by-component without understanding the system. Renogy solves this problem immediately. On the first page of the installation section, you are greeted by the System Wiring Diagram.


This isn't a vague illustration. It is a full-page, color-coded schematic that acts as your roadmap for the entire project. It shows the complete flow of electricity: from the solar panels on your roof, down to the MPPT battery charger, then over to the DC busbars, into the battery bank, and finally through the inverter to power your AC outlets.
If you have ever tried to piece together a solar system from random YouTube videos, you know how valuable a single trusted diagram is. This section alone saves you hours of cross-referencing.
What's in the Box?
Opening the box of an RV power kit can be overwhelming. There are fuses of varying sizes, brackets, Bluetooth modules, and cables of different thicknesses. The manual tackles this with a robust inventory table.
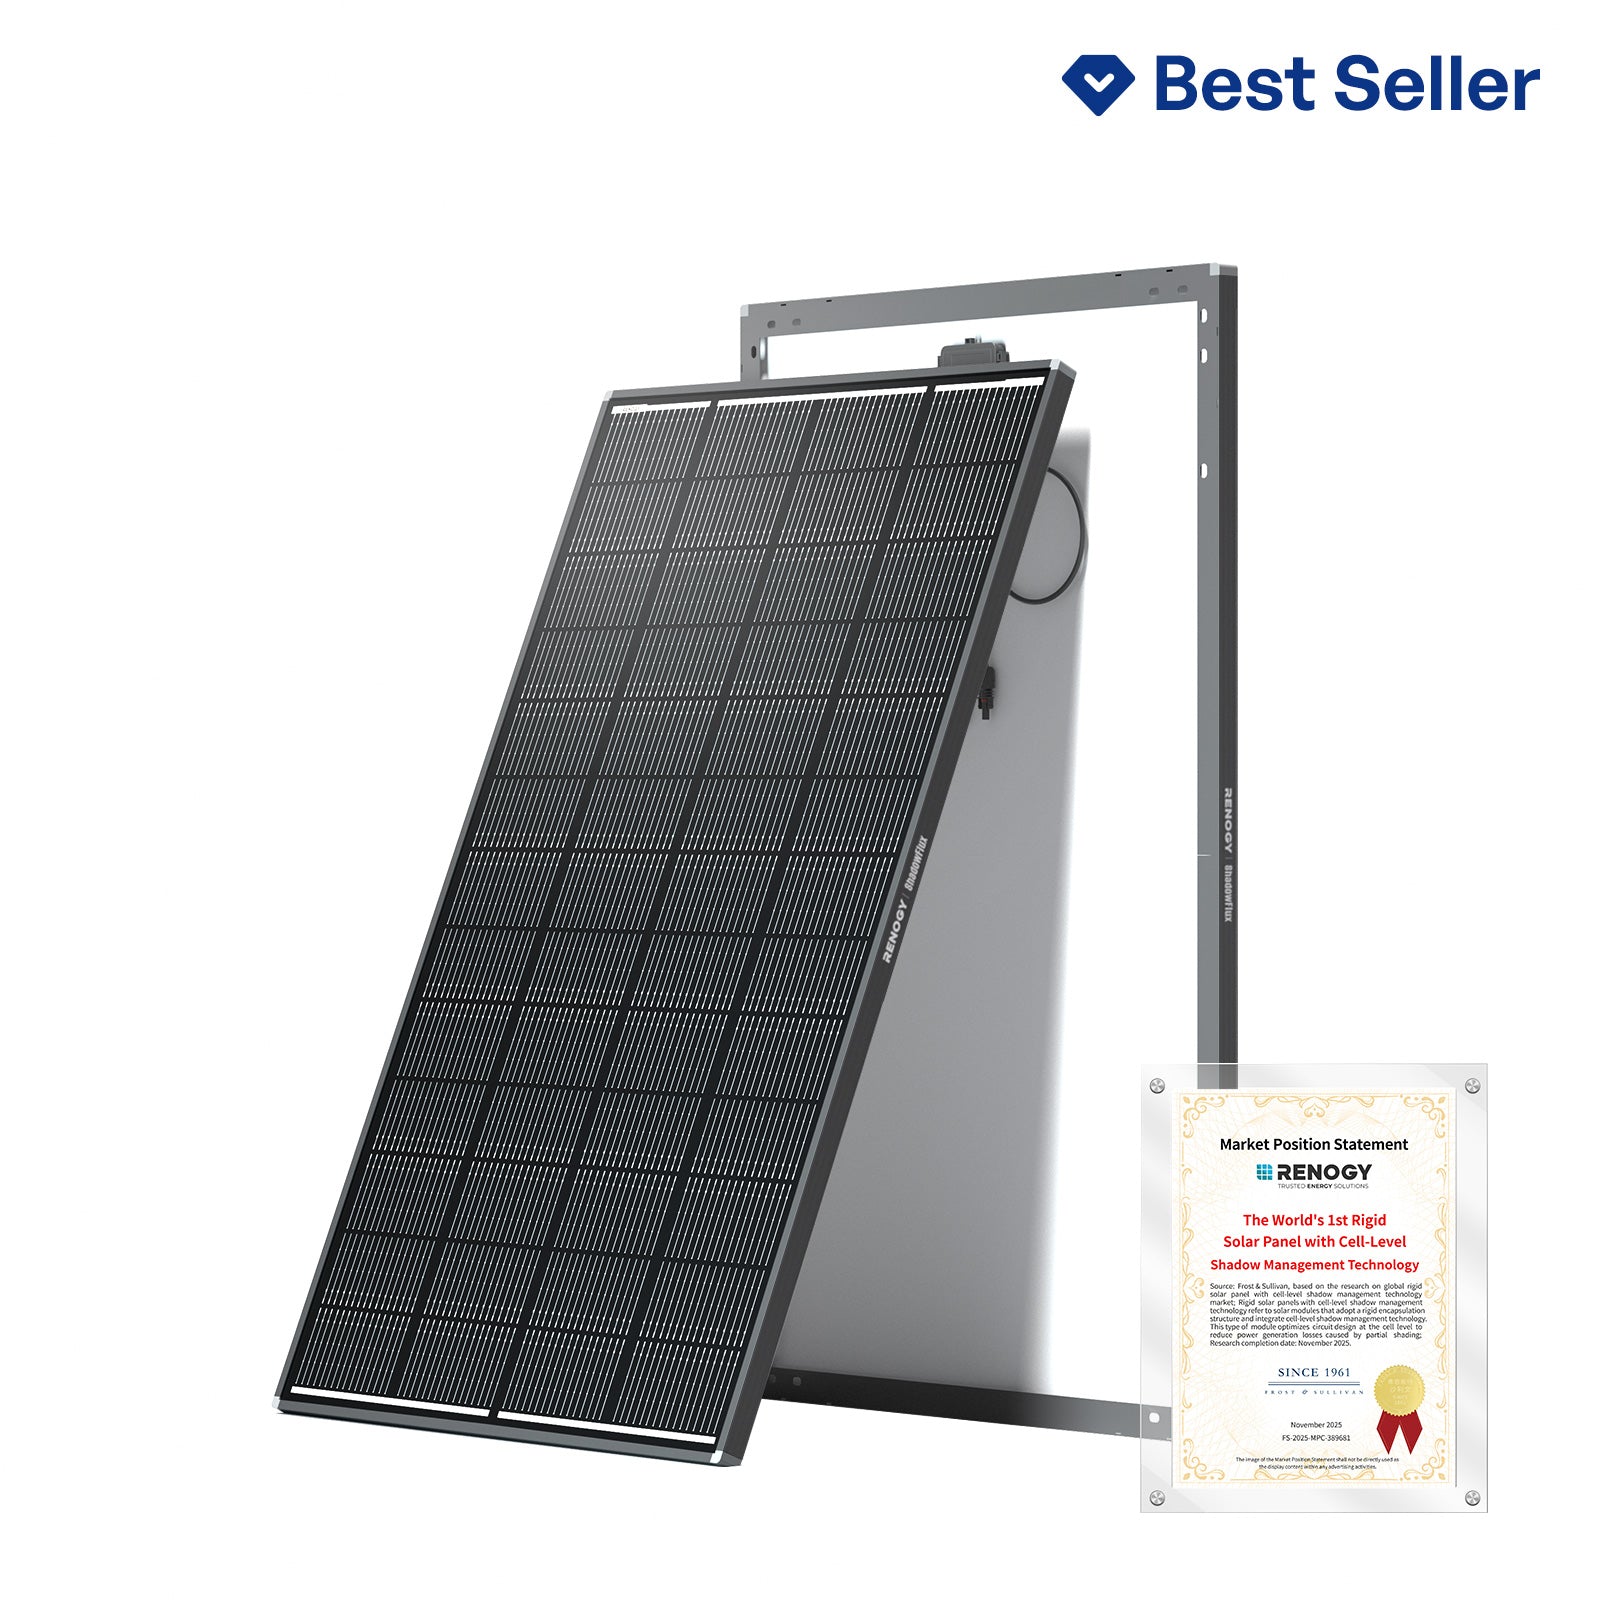
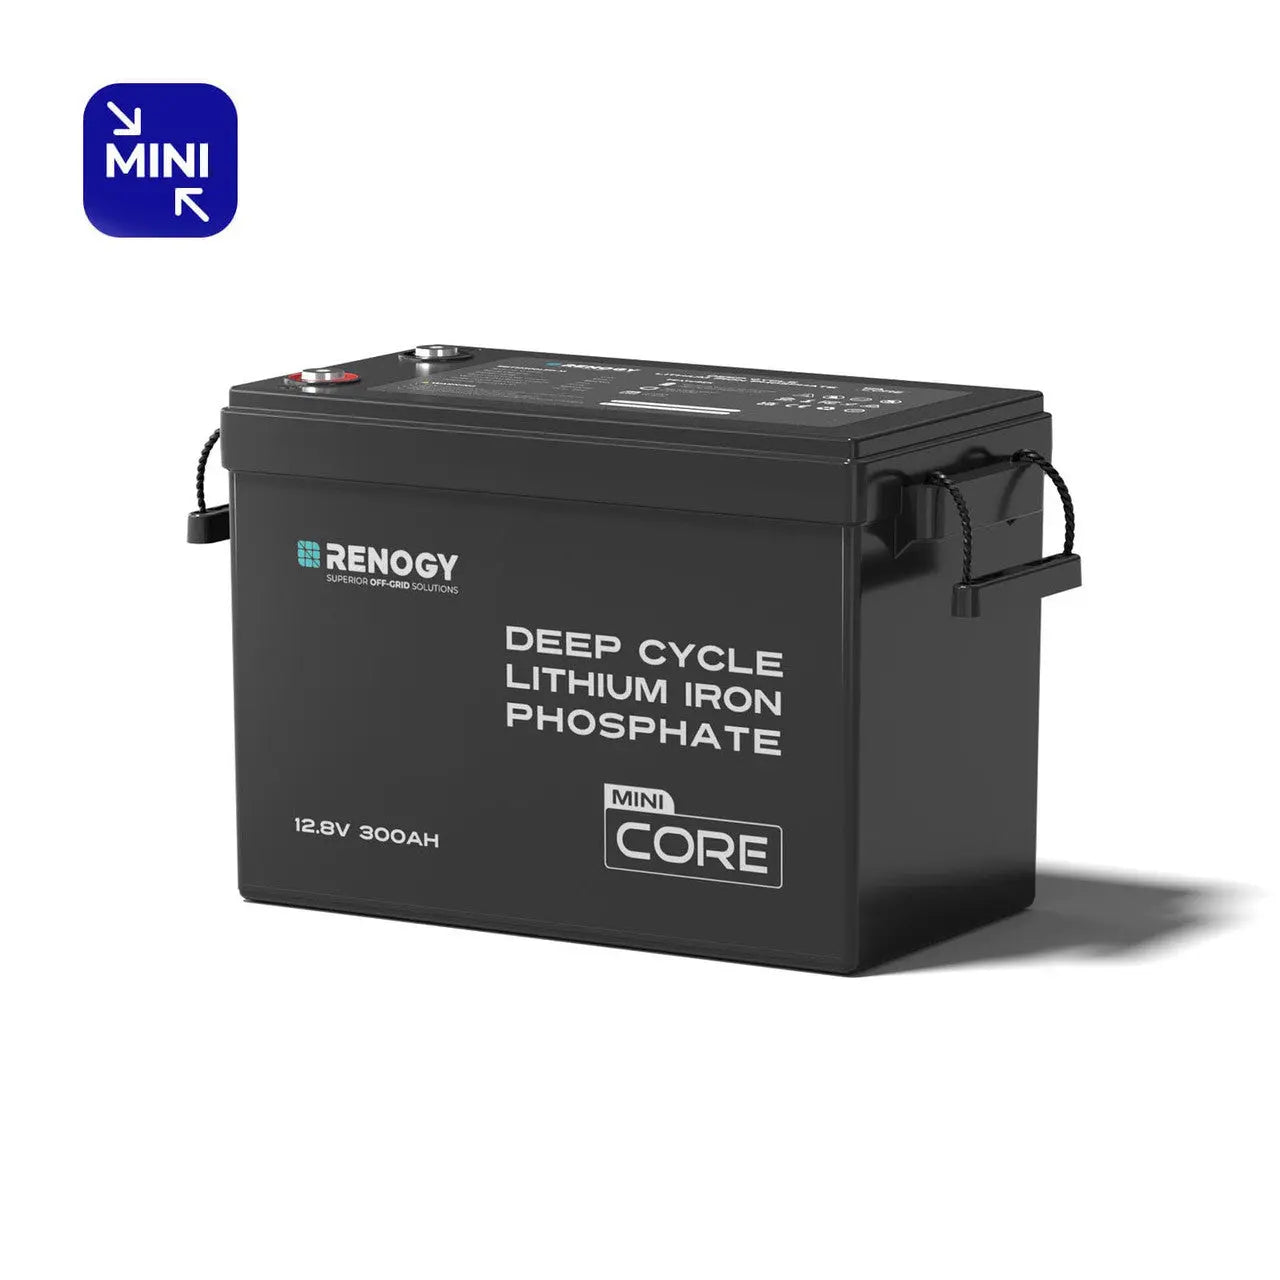
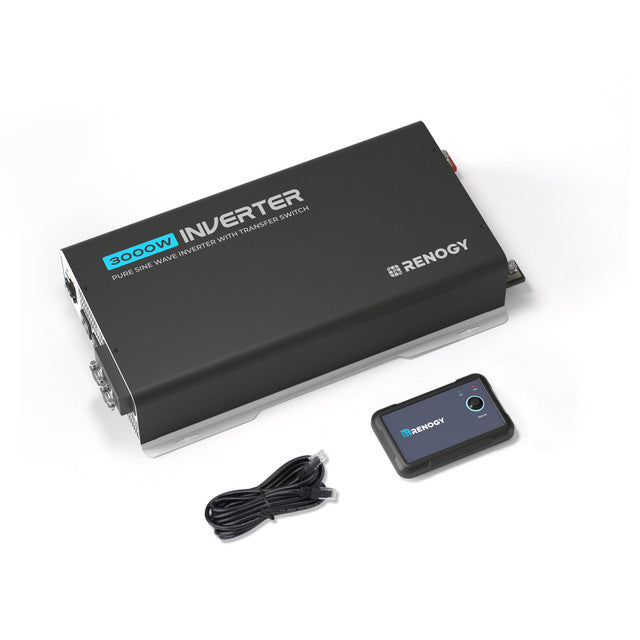
- For the 3.8kWh RV Solution, you get one 200W ShadowFlux N-Type solar panel, a 300Ah LiFePO4 battery, a 2000W pure sine wave inverter, a 50A DC-DC Battery Charger, and over 25 accessory items.
- For the 7.6kWh RV Solution, the package includes two ShadowFlux solar panels, a pair of LiFePO₄ batteries that total 7.68kWh of storage, a 3000W inverter, and enhanced wiring and accessories, ensuring reliable performance under increased current loads.
None of this is hidden in fine print. It's all laid out in the wiring diagram and repeated in the connection steps. You don't need to guess; you just follow the visual map.
Required Tools & Accessories
A common frustration with many DIY kits is the assumption that you have a fully stocked auto-electrician workshop. Renogy is refreshingly honest about this. The manual clearly distinguishes between what is included and what you need to supply.
You will need to pick up a few key items yourself:
- The cables from the starter battery to the charger (as distances vary per vehicle).
- A 10 AWG grounding cable for the inverter chassis.
- Basic hand tools (wrenches, drill, wire strippers, phillips screwdriver, multimeter).
Crucially, the manual does not leave you guessing about sizes. It includes a dedicated cable gauge table that dictates exactly what wire thickness you need based on the distance between your starter battery and the charger:

This kind of specific sizing advice removes the guesswork that usually leads to voltage drop or, worse, melted wires. It is the difference between a manual that assumes you are a professional and a manual that empowers you to become one.
Step-by-Step RV Solution Installation
The installation is broken down into 8 logical steps. It walks you through the process exactly as an electrician would. For detailed information, check the Install RV Solar Kit Guide.
Step 1: Connect the Battery Bank to the Busbars
The manual shows you how to connect the negative terminal to the shunt, then to the black busbar, while the positive runs through a fuse and a battery switch before hitting the red busbar. It also reminds you to attach the temperature sensor to the battery casing, which is a detail many novices forget.
Step 2-3: Connect the Battery Charger to the Busbars & RV Starter Battery
The wiring process consists of two main parts: connecting to the busbars and connecting to the starter battery.
- For the busbar connections: Connect the charger's NEG- terminal to the black busbar, and connect the OUT+ terminal through an 80A fuse to the red busbar.
- For the starter battery connections: Connect the vehicle's starter battery negative to the black busbar, and connect the ALT+ terminal through another 80A fuse to the starter battery positive. Additionally, connect the shunt's B2 terminal to the starter battery positive.
A key highlight is the smart alternator IGN signal wiring. The manual specifies that if your vehicle has a smart alternator, you must install the included IGN signal wire. Connect one end to the charger's IGN port, and the other end either to the smart alternator's IGN terminal or to the ignition fuse in the vehicle's fuse box.
Step 4: Connect the Solar Panels
The wiring differs slightly between the two kit sizes:
- For the 7.68kWh RV Solution, you use Y-branch connectors to combine the two panels into a single feed. The combined negative goes to the black busbar, and the combined positive runs through a 30A fuse before reaching the PV+ terminal.
- For the 3.84kWh RV Solution, the single panel connects directly: negative to the black busbar, positive through a 15A fuse to the PV+ terminal.
In both cases, always connect the battery first, keep the panels covered until the cables are secured, and double-check fuse ratings to protect the charger.
Steps 5-8: Finishing Touches
You install the BT-2 Bluetooth module, connect the inverter ground, wire the remote switch, and finally attach the inverter to the busbars. Every single bolt torque specification is included.
This isn't a "figure it out" guide. It is a highly structured sequence that you can follow at your own pace.
FAQ
One of the most valuable sections of the guide is the dedicated FAQ. It feels like the manual is reading your mind and answering your anxieties before you even call customer support.
200W solar panel seems small for a 3.84kWh battery, will it run out of power on cloudy days?
Yes, solar alone would take 3-4 days to recharge. But it immediately clarifies the system design—your primary charging source is actually the vehicle's alternator via the DC-DC charger. The solar is the backup. This sets realistic expectations.
Can the Bluetooth module monitor battery state of charge?
It cannot monitor the battery. This is crucial because it prevents the user from expecting the BT-2 to act like a battery monitor, which is a separate device.
Why can't I mix other battery models in parallel?
Mixing different brands or models can cause: uneven current distribution, conflicting BMS logic, and the risk of thermal runaway.
Safety Manual
Toward the back, you will find a two-page safety section that is raw, practical, and life-saving. It treats electricity with the respect it deserves.
Key Safety Rules (extracted from the manual)
-
Personal protection
Wear proper protective equipment and use insulated tools during installation and operation. Do not wear jewellery or other metal objects when working on or around the devices. -
Explosion hazard - critical warning
Risk of explosion! Never install the battery charger and inverter in a sealed enclosure with flooded batteries, and do not place them in a confined area where battery gases can accumulate. -
Polarity check before connection
Confirm the polarities of the devices before connection. Reverse polarity contact will result in damage to the devices and void the warranty. -
Golden rule of wiring
Connect the negative prior to the positive terminal when connecting any device – this is the single most important rule for safe installation and proper function.
Scalability and Expansion
A good system is one that grows with you. The manual acknowledges that your power needs today might not be your needs in two years.
- Solar Expansion: Both kits support up to 600W (three 200W panels). If you find the 200W inadequate, you can easily add more (parallel connectors required).
- Battery Expansion: The system supports paralleling up to eight 12V 300Ah lithium batteries. However, the manual strongly cautions that these must be the same model to ensure the BMS parameters align.
This forward-thinking approach means you aren't buying a dead-end system. You are buying a foundation.
Conclusion
The Renogy RV Solution Quick Guides are not fluff. They are technical documents written by engineers who have clearly spent time in the field, listening to what real customers struggle with. They provide a complete blueprint, a detailed inventory, clear tool requirements, honest FAQs, and an unforgiving approach to safety.
Whether you are eyeing the compact Go Far 3.8kWh RV Solution for weekend trips or the robust 7.6kWh Go Further RV Solution for full-time off-grid living, treat the quick guide as your most important tool. Read it before you touch a single screw. Understand the flow. Follow the sequence. Then, go build something amazing.


