


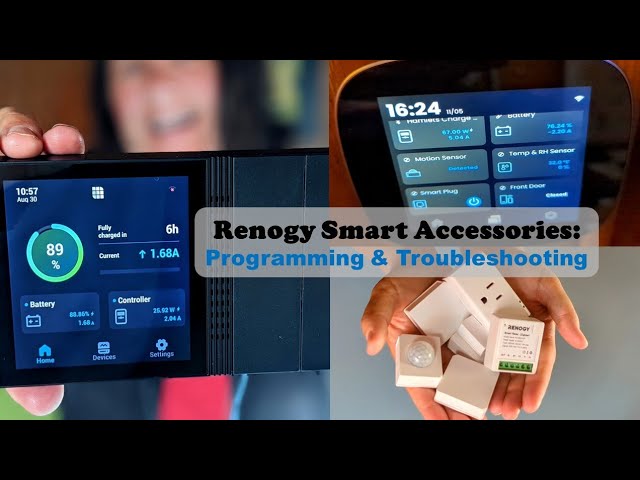
Smart Accessories: Make Your Off-Grid Home More Efficient & Secure!
Ever wish you could monitor your off-grid home or rig from afar? Perhaps you want to be able to program lights, heating/cooling, and other appliances while you are away? Maybe reduce worry about theft? Renogy’s Smart Accessories are a great way to make your system more efficient and secure!
You’ve worked hard to design an efficient system and collect that precious solar energy, now let’s talk about how to make it all even smarter. We are full-time RVers who live, work, and travel in a tiny vintage camper – we’ve been living off-grid for over 11 years now and have traveled all over the continent. For an overview of our system, and to learn how to size your own, see our recent blog.
We’ve recently installed and tested the full set of Smart Accessories that coordinate with the Renogy ONE Core and Renogy ONE M1 solar energy monitors. Each of the 6 Smart Accessories connect to either of these Renogy ONE monitors wirelessly, and they are so small, you can hold all of them in your hands! They are all sold separately so you can buy just one or multiple of the same one if you’d like.

Smart Accessories in Hands
This blog is designed to complement our video and in it we’ll discuss:
-
Each of the six Smart Accessories, what they can do, and ideas for combining them.
- Installation and programming Smart Scenes through the DC Home App so that they work with your monitor.
- Some troubleshooting options/solutions if you run into issues during the process.
If you are not yet familiar with the Renogy ONE Core and/or Renogy ONE M1 monitors, be sure to check out these videos on our YouTube channel to get a better understanding of what they do and how these accessories will integrate with them.
Note: A subscription is no longer required for any of the accessories!
What are Smart Accessories?
Door & Window Sensor: There are two pieces to this unit, and they are magnetic. Mount one part to the door, or window, and the other to the frame. When the door or window opens, they come apart and the unit will trigger an “opened ”status on the monitor. Then you can program the monitor to do something specific when they separate, like turn on lights or trigger an alarm or notification.
Motion Sensor: It truly detects the slightest motion in its hemisphere, so you can base a program scene around that to secure your rig or simply turn on lights at night.
Smart Plug: Turns any standard AC outlet into a smart outlet so that you can control it remotely, or on the unit itself, or program it to come on under specific conditions or times of day.

Smart Plug with Appliance Plugged In
Temperature & Humidity Sensor: Helps you monitor the conditions in your rig remotely, but can also be programmed to work with other smart devices or turn on a fan or a heater when the sensor reaches a specified temperature. All programmable to your own needs.
Smart Relay: This is an electronic switch that will work with either DC or AC appliances. You’ll wire this up to turn on a circuit electronically, which then allows various accessories to play together.

Smart Relay Wired Into System
Wireless Scene Switch: Allows you to use one button to customize different Smart Relays to turn on or off multiple appliances, or even to control multiple scenes all with the touch of a button. It’s like a customizable master switch for your system -- use a long press for lights to come on, double tap for fan to come on, single press for music to come on…you get the idea!
Combining Smart Accessories Together
The accessories can be used individually or be combined to do work together to help automate some things in your rig or off-grid home. There are almost endless scenarios and combinations that you could come up with, but here are four quick scenarios we’ve tested in our own rig:
- Use the Smart Plug to activate an AC appliance at a specific time – just once, or each day, whatever you prefer. This could be used for lights, coffee maker, heater, electric kettle, or crockpot.
- Combine the Door & Window Sensor with the Smart Plug to turn on lights when you come home. When the door opens, you can set the condition for the Smart Plug to turn on…and voila the lights come on! If the Smart Plug is already on, no big deal, nothing happens – so you won’t have to worry about it going on and off every time the door opens.
- Combine the Door & Window Sensor with the Motion Sensor to create an alert when someone unexpectedly enters your rig. This can be an alarm or a notification to your phone…or both. If you have multiple doors and windows, you can purchase one of these little gadgets for each door or window.
- Combine the Temperature & Humidity Sensor and Smart Relay so that a ceiling vent fan will come on when the inside temperature of your rig gets too hot. This is a great feature for pet owners who can’t always take their pups (or adventure cats!) out on the trail with them.
Installing Smart Accessories
First off, make sure that you have installed the DC Home App and it’s paired via Bluetooth with your Renogy ONE monitor. Then, turn on the Renogy ONE monitor and follow the on-screen instructions (you can watch this process in detail in our previous videos mentioned above).
The instructions for the accessories suggest adding the accessories using the DC Home App, but we found that it was easier to add them to the Renogy ONE monitor directly, then use the app to program the scenes.
- Open up each accessory and remove the battery tab.
- Using a paper clip, long press the reset button, so that the Smart Accessory will enter pairing mode. Note: Some have external reset buttons instead of holes.
- Select the middle icon on your home screen of the Renogy ONE.
- Click “Add Device.”
- When it recognizes the device, click “Add,”

Motion Sensor Being Reset with Pin
You’ll see the Smart Accessory show up on the monitor, then you can click on it to rename it, like “Front Door” or “Left Window.” This way you can connect as many of the same or different Smart Accessories as you want and you’ll know which one it is connected to. Once you’ve named them on the Renogy ONE Monitor, they will also show up the same way on your DC Home App.
Once you have all of the Smart Accessories connected to the monitor, we can now get to the fun part and start programming some scenes!
Programming Scenes
From the DC Home App, click on the icon labeled “Scenes” down at the bottom. You’ll see that there are three different menus for Scenes: Favs, Recommendations, and Custom.
With the different Smart Accessories now connected, Renogy has some pre-fab scenes already programmed, so you could just add one – like the one called “Arrive Home.” If you add this one, when the Motion Sensor detects anything, it will turn on the Smart Plug -- and if you’ve got lights plugged into it, they will come on. You can do the same thing with the scene labeled “Access Security” as it uses the Door & Window Sensor along with the Smart Plug. You can combine these to activate an alarm or notification.

Arrive Home Scene
You can use those recommended scenes, or you can program scenes that are useful for your own lifestyle. It’s pretty easy to do once you get your head around the process.
Let’s program the 4 scenarios described above:
- Using the Smart Plug, program the lights to come on at a specific time each day.
- Select the Plus (+) in the upper right-hand corner of the screen; this creates a new scene.
- Under “When,” choose the condition of “automatic” and set the timer to come on every day at 5:30pm. This is done on a 24-hour clock so set it for 17:30pm – this way there are no AM / PM mix ups.
- Under “Do,” select “Smart Plug” and ask it to turn on.
- Name it something like “Lights Come on in the Evening,” add it to favorites, and select “Save.”
- You’ll see the scene come up in the menu, and also on the home screen of the Renogy ONE monitor. And, of course, you could create another scene that turns the lights off at a specific time.
And just because you’ve set these scenes, it won’t interfere with your regular use. If you’ve already turned the lights on before 5:30pm, nothing will happen. Likewise, if you made a scene that turns the lights off at 11pm, but you’ve already turned them off manually and gone to bed before 11, nothing happens - the conditions for the scene are already met and the program runs itself.

Programming Lights Come on in the Evening Scene
- Using the Door & Window Sensor and the Smart Plug together, you can program the monitor to turn on lights in the evening when you open the door, very useful when you come home after dark.
- Select the Plus (+) again, but this time under “When,” choose the “Door Sensor.”
- Choose “Open” and select done.
- Under “Do,” set it to turn on whatever is connected to the “Smart Plug.”
- Name this Scene something like “Door Open + Lights.”
- Combine the Door Sensor with the Motion Sensor to notify you if someone unexpectedly enters your rig. Check out this moment in our video review to see this process in action when a “burglar” tries to enter our rig!
- Select the Plus (+) again, select “When” and choose “Door Sensor is open.”
- When you add a second condition, it will ask you to choose between “When all or some conditions are met.” In this case, we want both the Door Sensor and the Motion Sensor on, so we’ll choose “When all conditions are met.”
- Scroll down to “Motion Sensor” and select it as well.
- You’ll see here that there are 2 conditions, so nothing is going to happen unless the door opens AND there is motion in the camper.
- Under “Do,” you can choose from a variety of options. In this case, choose all of them, including: 1. alarm. 2. notification sent to your phone* and 3. turn on some lights (and/or a webcam) with the Smart Plug or Smart Relay.
*In order for a notification to be sent to your phone, your Renogy ONE monitor needs to have a wifi connection AND you need to allow notifications in the apps settings for the DC Home app.

Side by Side Image of Renogy ONE and DC Home App
When you’ve got a few of these scenes programmed, they appear on the home screen of both the app and the Renogy ONE monitor. It seems that it’s easier to control the scenes from the app though, but you can control some of the functionality from the monitor.
- Try the Temperature & Humidity Sensor AND Smart Relay combination. We wired this up to work with our Fantastic Fan Vent on the roof of Hamlet.
- Choose the “Plus (+)” again to create another scene.
- Under “When,” choose “Temperature,” and then set the parameter. We chose 75℉.
- Then under “Do,” select “Smart Relay” so it will turn on.
- You can also set another scene to turn off the relay when it cools back down, so that you have the perfect temperature for the family pooch, cat, or even yourself when you return home from a long hike!
There are just so many possibilities with these programmable scenes, so get creative and have fun with these gadgets! Check out our full video to see all of these accessories and scenes in action. We invite you to use the comment section for this video to ask questions and share your experiences with these Smart Accessories.
Frustrations & Troubleshooting
These monitors and accessories are relatively new and not intuitive for the non-techie type, but the engineering team at Renogy are constantly making them better with feedback from consumers.
We've experienced a little bit of frustration while trying to connect these devices and start programming. If you are not a tech whiz, don’t worry, put on your patient hat, give yourself plenty of time, and keep these troubleshooting options in mind.
- Once you’ve paired the app with the monitor, try to keep the app connected to the monitor rather than trying to connect to any of the BT modules or components directly, just use the app as a screen.
- If something gets funky and isn’t working as expected, just reset the monitor and start over again, it’s not a very long process and it gives you a clean slate.
- You can also update, uninstall, and reinstall the app on your phone. The device remembers your account and all of your information will be available when you open up the app again.
- The tiny little booklets that come with each of the Smart Accessories say to pair them by using the app, but we found that this didn’t work and it’s better to add them through the monitor then use the app to program the individual “Scenes.”
Now that your off-grid home is more efficient and more secure, you can spend more time enjoying it and less time worrying about it. Now, get out and have some fun!

In 2012, Shari Galiardi & David Hutchison left behind careers and a comfortable home in North Carolina to travel with the vintage camper trailer they lovingly restored, outfitted with solar, and named "Hamlet." What began as a short break from careers and responsibility quickly turned into a love affair with roadlife. They have parlayed their higher education backgrounds, desire for life-long learning, and thirst for adventure travel into writing, photography, video production, and public speaking gigs from coast to coast. Known to their friends as simply Shari & Hutch, you can learn more about their full-time, solar-powered adventures on their website at freedominacan.com. Or, follow them on Facebook, Instagram, and YouTube as “Freedom in a Can, LLC.”


