
Solar System Maintenance
What Maintenance Can you Expect with your Solar Powered System?
Whether you dove head first into a full DIY solar install or hired a professional solar contractor, keeping your solar components running in top form is relatively straight forward. How much maintenance you can expect depends on the complexity and size of your set-up. Today’s solar components are manufactured for a wide variety of rugged environments and remote areas so even a small amount of attention should keep your system running smoothly for years.
Below is a checklist that we put together for our own small system, along with a few recommendations for keeping your solar powered system running in top form for many years. It’s important to check each of the 4 major components of the system -- the whole is greater than the sum of the parts.
❏
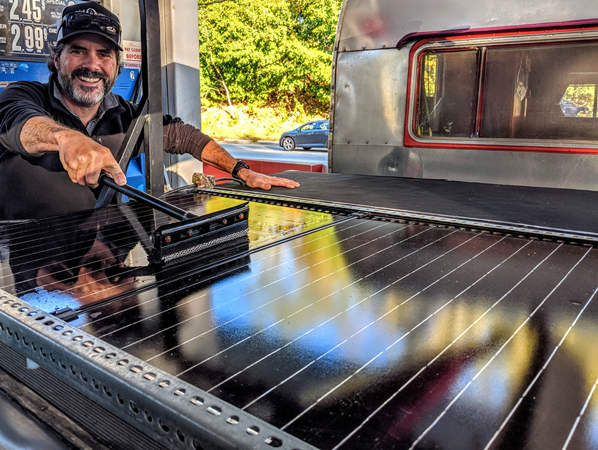
Clean the panels using a soapy sponge and wipe dry with a squeegee.
If your panel is easily reached, this can be done each time you fill up at the gas station. If you have permanent panels mounted on the roof of your RV, check every few weeks, especially if it hasn’t rained frequently or if you’ve been parked under
trees.
❏ Clear obstructions from shading the panels.
With a permanent install on a house or an RV that remains in one location for a season/year, it is important to make sure that no trees or plants have grown into the solar path of your panels. Check the solar panels throughout the day, and throughout the seasons to make sure that there isn’t a stray limb robbing you of your capacity. A cool tool to help locate a permanent or even temporary solar set up is the Solar Pathfinder.
❏
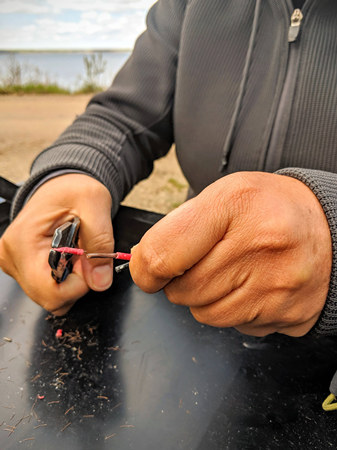
Inspect MC4 connectors.
Ensure that the insulation around each wire is intact and each MC-4 is in good shape (no sun damaged or broken clips). We use a portable solar suitcase, therefore we constantly disconnect and reconnect the wiring using the MC4 connectors. As a result, they inevitably wear out over time. Check out this
video for an explanation of how to repair or replace these connectors.
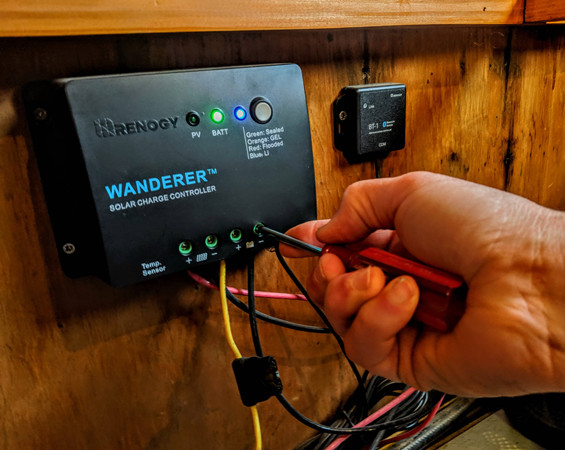
❏ Inspect wire connections to the charge controller.
Ensure that all connections are snug and free from corrosion.
❏
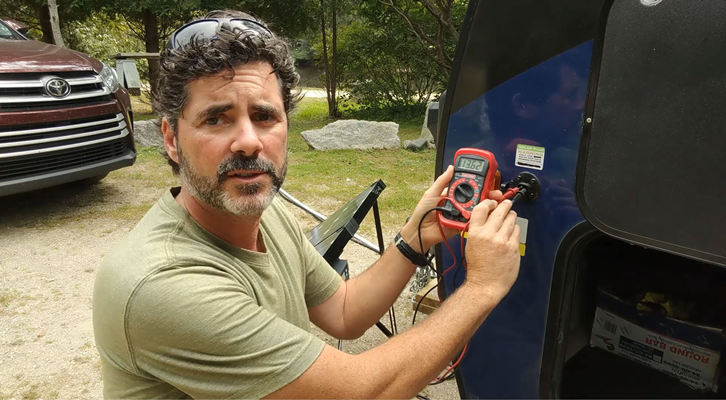
Test solar output with voltmeter.
One way to ensure that the panels are working appropriately is to test their power output with a handheld voltmeter. Simply insert the testing probes into the solar panel terminal input on the charge controller.
❏ Disconnect the solar panels via the MC4 connectors before proceeding with the following.
❏
Clean the controller using a dry cloth to remove dust or debris from the unit.
Also, clean the area around the unit using a damp cloth or vacuum. Make sure the area is completely dry and well-ventilated before you close the compartment. We do this every quarter, since we travel on bumpy, dusty roads and encounter damp conditions as we move through various regions and ecosystems.
❏
Inspect all wiring going into and out of the charge controller for damage or corrosion.
Replace or repair any wires that show signs of wear. Important Safety Note: Never let positive and negative wires come into contact with each other as a dangerous spark can occur.
❏ Inspect and replace any worn out fuses.
Common locations for fuses are between the solar panel and the charge controller and between the charge controller and the battery. Note: This may be more geared toward troubleshooting a system that is not working properly, but it is always good to do a health check of the fuses when you are inspecting the wiring.
❏
Reconnect all wires and snug up all terminals.
Important Safety Note: Make sure the charge controller is reconnected to the battery before reconnecting the wires from the solar panel.
❏ Reconnect the MC4 connectors to the solar panels.
This re-establishes the flow of electricity from the panels to the charge controller and battery.
❏ Ensure that the controller is set for the appropriate battery.
Every type of battery has different charging requirements so it is important that the unit is set for the appropriate battery type.
❏
Test solar output with voltmeter
Use a voltmeter to confirm that the output from the solar panel and output from the charge controller are equivalent to what the unit is showing on either the digital display or Bluetooth app.
Note: While this step is more for troubleshooting any problems, this is a good
final step to do while you are doing other maintenance as it may prevent problems down the road.
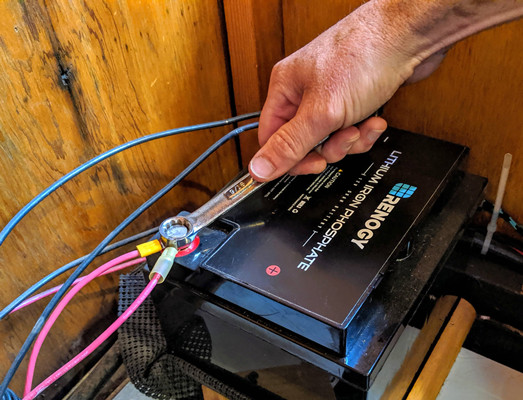
❏ Check wire connections to the batteries for corrosion or loosening.
With anything that rolls down the road, things have a way of moving, shifting, and coming loose. After checking the wires and/or doing any repairs, be sure to snug up the wiring at each of the terminals.
❏ Ensure that the charge controller is set to your type of battery.
With the appropriate solar gain, the charge controller will then cycle through the appropriate charging stages required for your type of battery. At this point, you don’t have to do anything beyond placing the panel in the sun, the charge controller will take care of the rest.
❏ Check your battery’s manual for any other maintenance recommendations.
All batteries have unique considerations, like operating temperature. Be sure to familiarize yourself with your specific battery type and requirements.
❏ Check wire connections to the batteries for corrosion or loosening.
With anything that rolls down the road, things have a way of moving, shifting, and coming loose. After checking the wires and/or doing any repairs, be sure to tighten up the wiring at the terminals.
❏ Inspect and replace any worn fuses.
Common locations for fuses are within the housing of the inverter itself. Check your inverter’s manual for the location of the fuse, if it isn’t obvious.
❏ Clean any debris from the fan.
Inverters typically have a cooling fan for the circuitry. Check the fan intake and exhaust to ensure that there is no build up of dust, pet hair, or other debris that
would impede the performance of the fan.
With just a little bit of maintenance, your solar powered system should give you years of trouble free service. The maintenance can be fun and help you learn more about your energy needs.
If we’ve inspired you to go solar with Renogy, please use our affiliate link and promo code “canlife.” You will get a 10% discount and we will get credit for the sale. It’s win-win! And, as always, contact us directly with any questions. We love to hear from our readers!
Shari Galiardi & David Hutchison have turned their higher education backgrounds, desire for life-long learning, and thirst for adventure travel into writing, photography, video production, and public speaking tours from coast to coast. Known to their friends as simply Shari & Hutch, you can learn more about their full-time, solar powered adventures on their website at freedominacan.com. Or, follow them on Facebook, Instagram, and YouTube as “Freedom in a Can.”


