
Our Vintage Rig Gets a Modern Solar Upgrade & Solves Two Nagging Full-Time RVer Problems
It was time for an upgrade. For the past 9 years, we’ve prided ourselves on living with less -- less space, less waste, less energy, less time spent working, and the need for less money overall. Solar power has been a key element to our success here. Like so many other things, the pandemic changed our work priorities, perhaps permanently, from focusing on in-person education to being more remote. With the public “workspaces” we usually relied upon suddenly unavailable, coffee shops and public libraries, we had to become more energy independent.
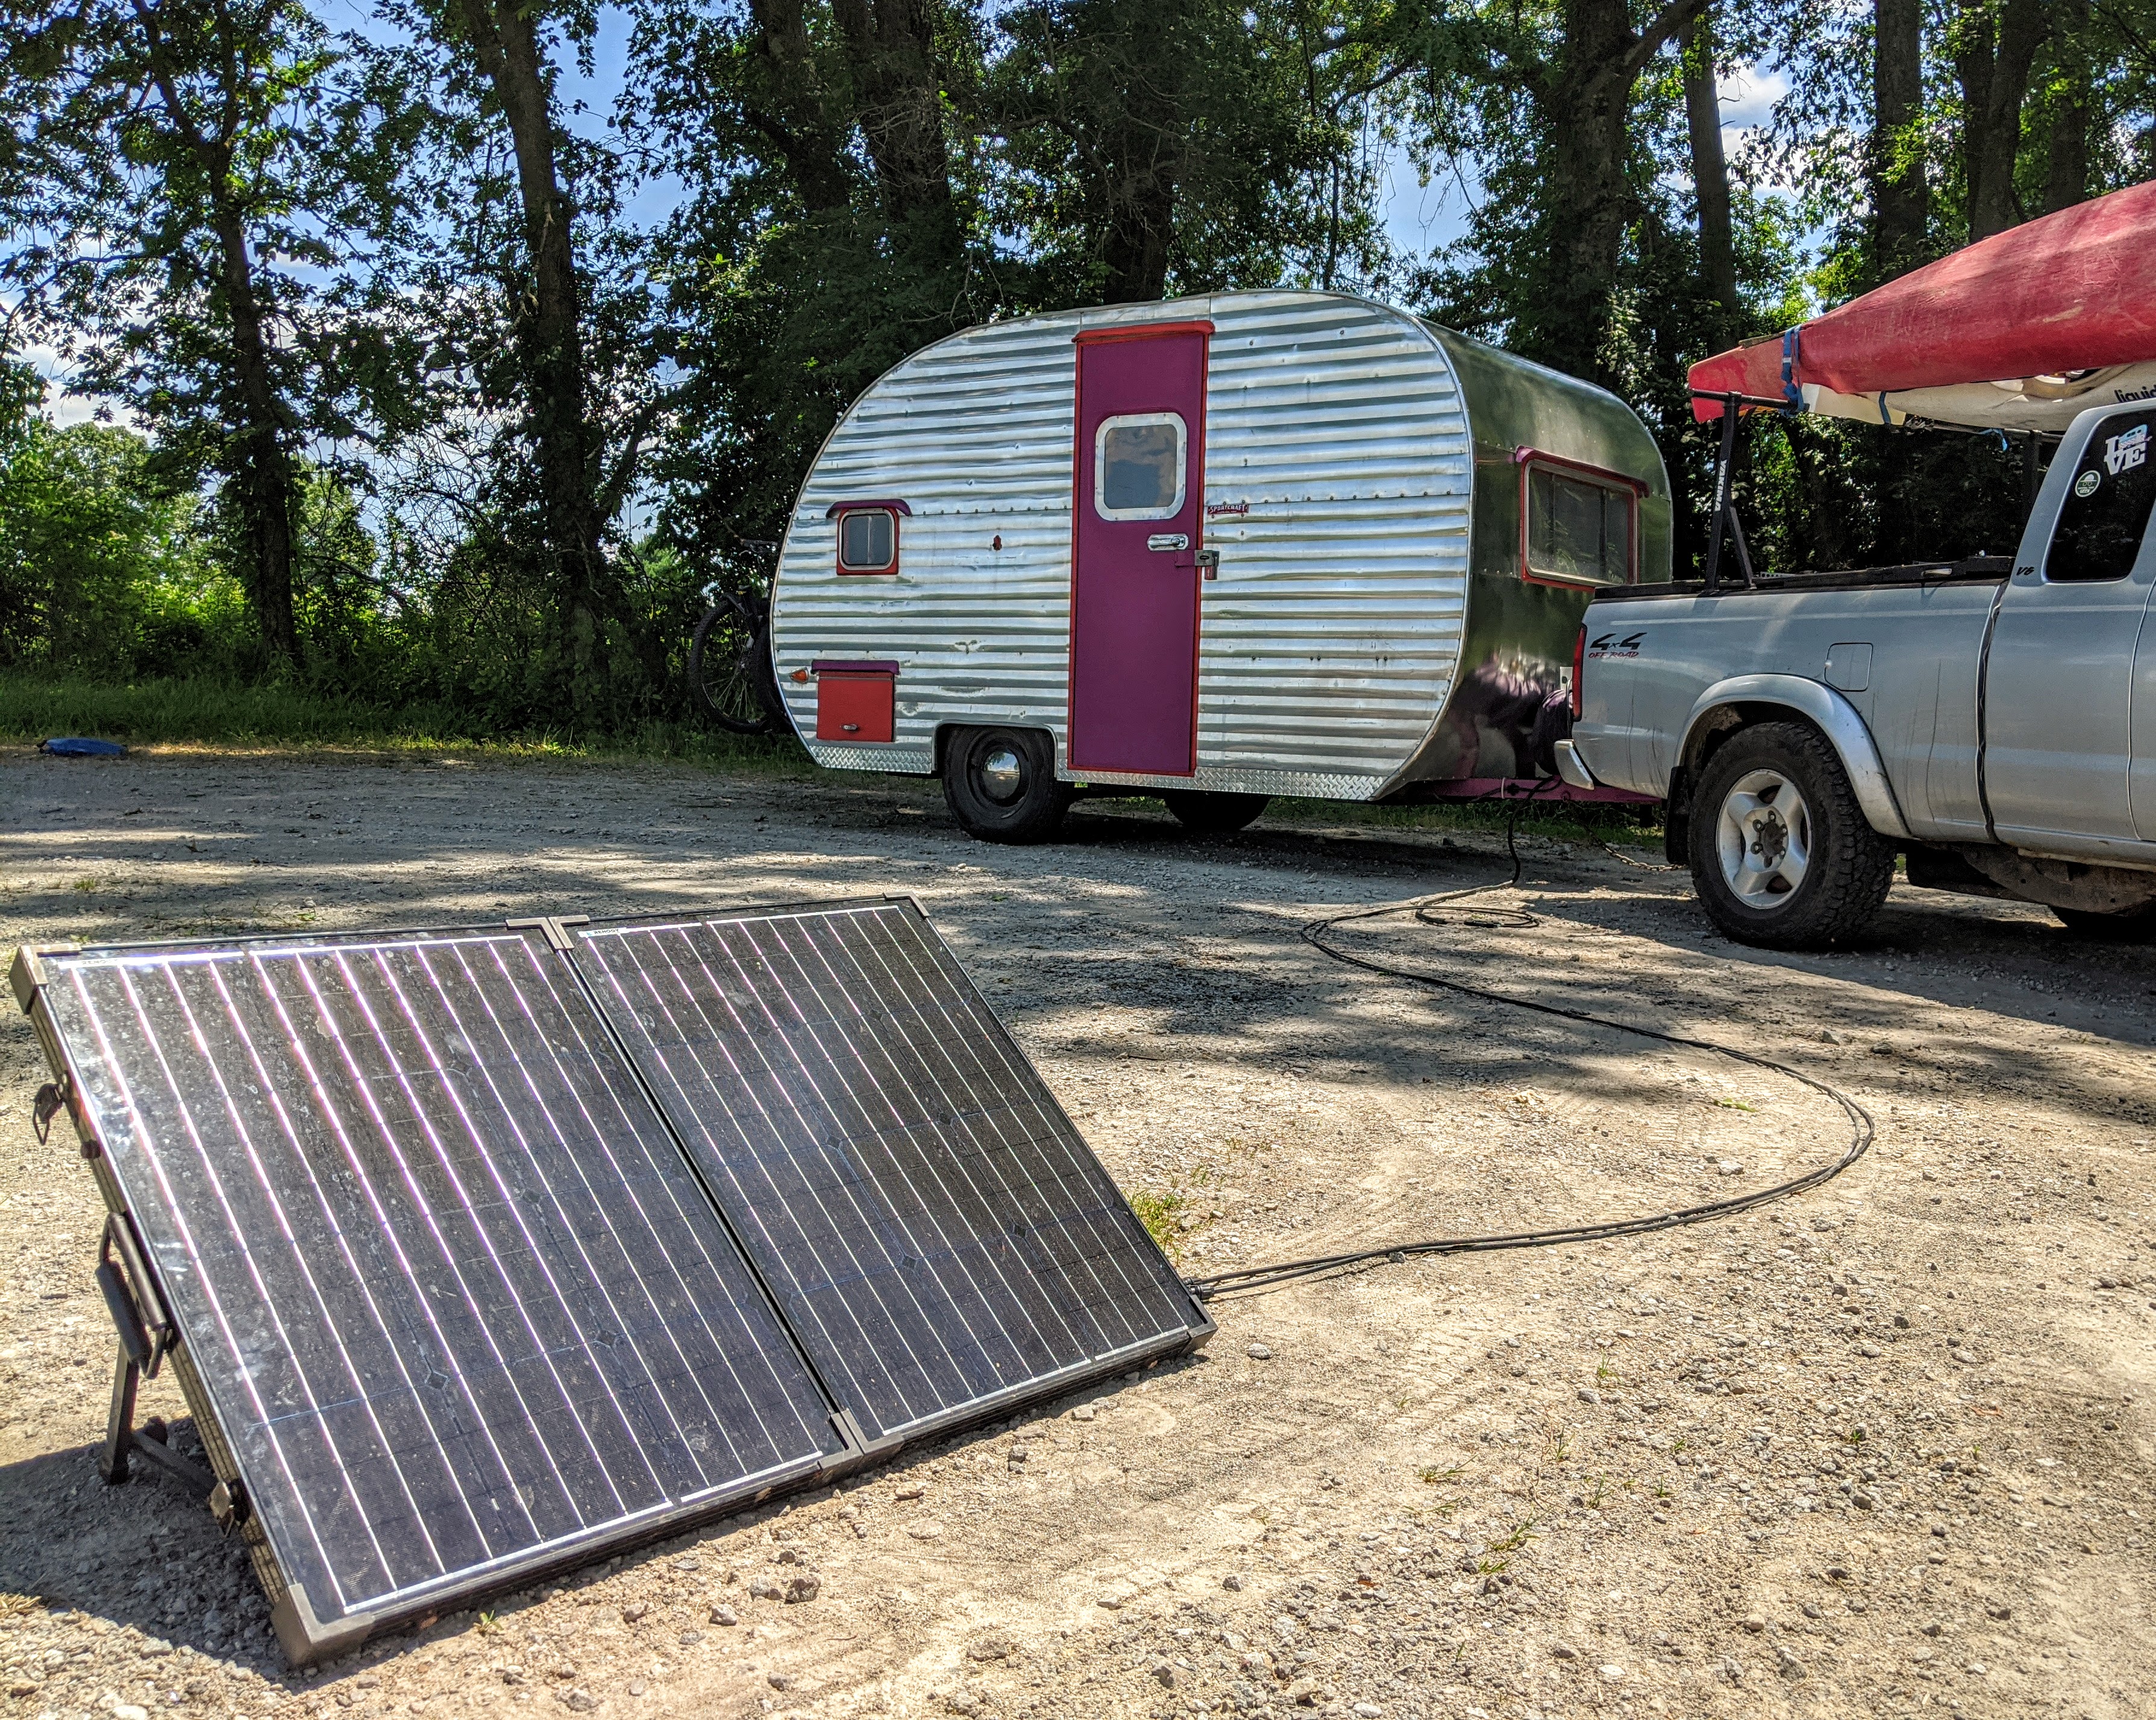
Now what we consider to be a major upgrade is probably closer to what most folks would call a “starter system.” We like it small; we keep it small, and sustainable. Our old system consisted of a 100W Portable Solar Suitcase which went through a PWM charge controller to a 50Ah LiFePo battery that powered a 700W inverter. We ran LED lights, a 12V vent fan, and charged up our portable electronics; it was all we really needed. But, with the new, more remote, demands of our mobile business, we needed to be able to collect and store more solar energy for those days when we dived into video production work from the road.
This spring, while boondocking in Arizona, we installed two solutions to the problems that really nagged us. The first was the aforementioned camper solar capacity, and the second was a cold food storage solution. The solar upgrade on our camper is practically a complete installation from top to bottom. We swapped out every component with the exception of the inverter – which is the simplest to install. As a plus, we were able to immediately put our old 50Ah LiFePo battery to use in our new food storage solution involving a new 12V ICECO cooler integrated into the back of our 2015 Nissan Frontier. Simply put..it has changed our life.
Our camper solar installation video goes over every aspect and step of this project, including a specific list of parts, tools, and diagrams. Now, after crossing the country from Arizona to Maine, we’ve put these new components to the test! We’ll share why we selected specific products, and whether they are living up to our expectations. Spoiler Alert: After 3 months, 3000 miles, and some extreme weather/wind conditions as well as some seriously bumpy roads, all components look like they were installed yesterday.
Can flexible solar panels pass the full-timers test?
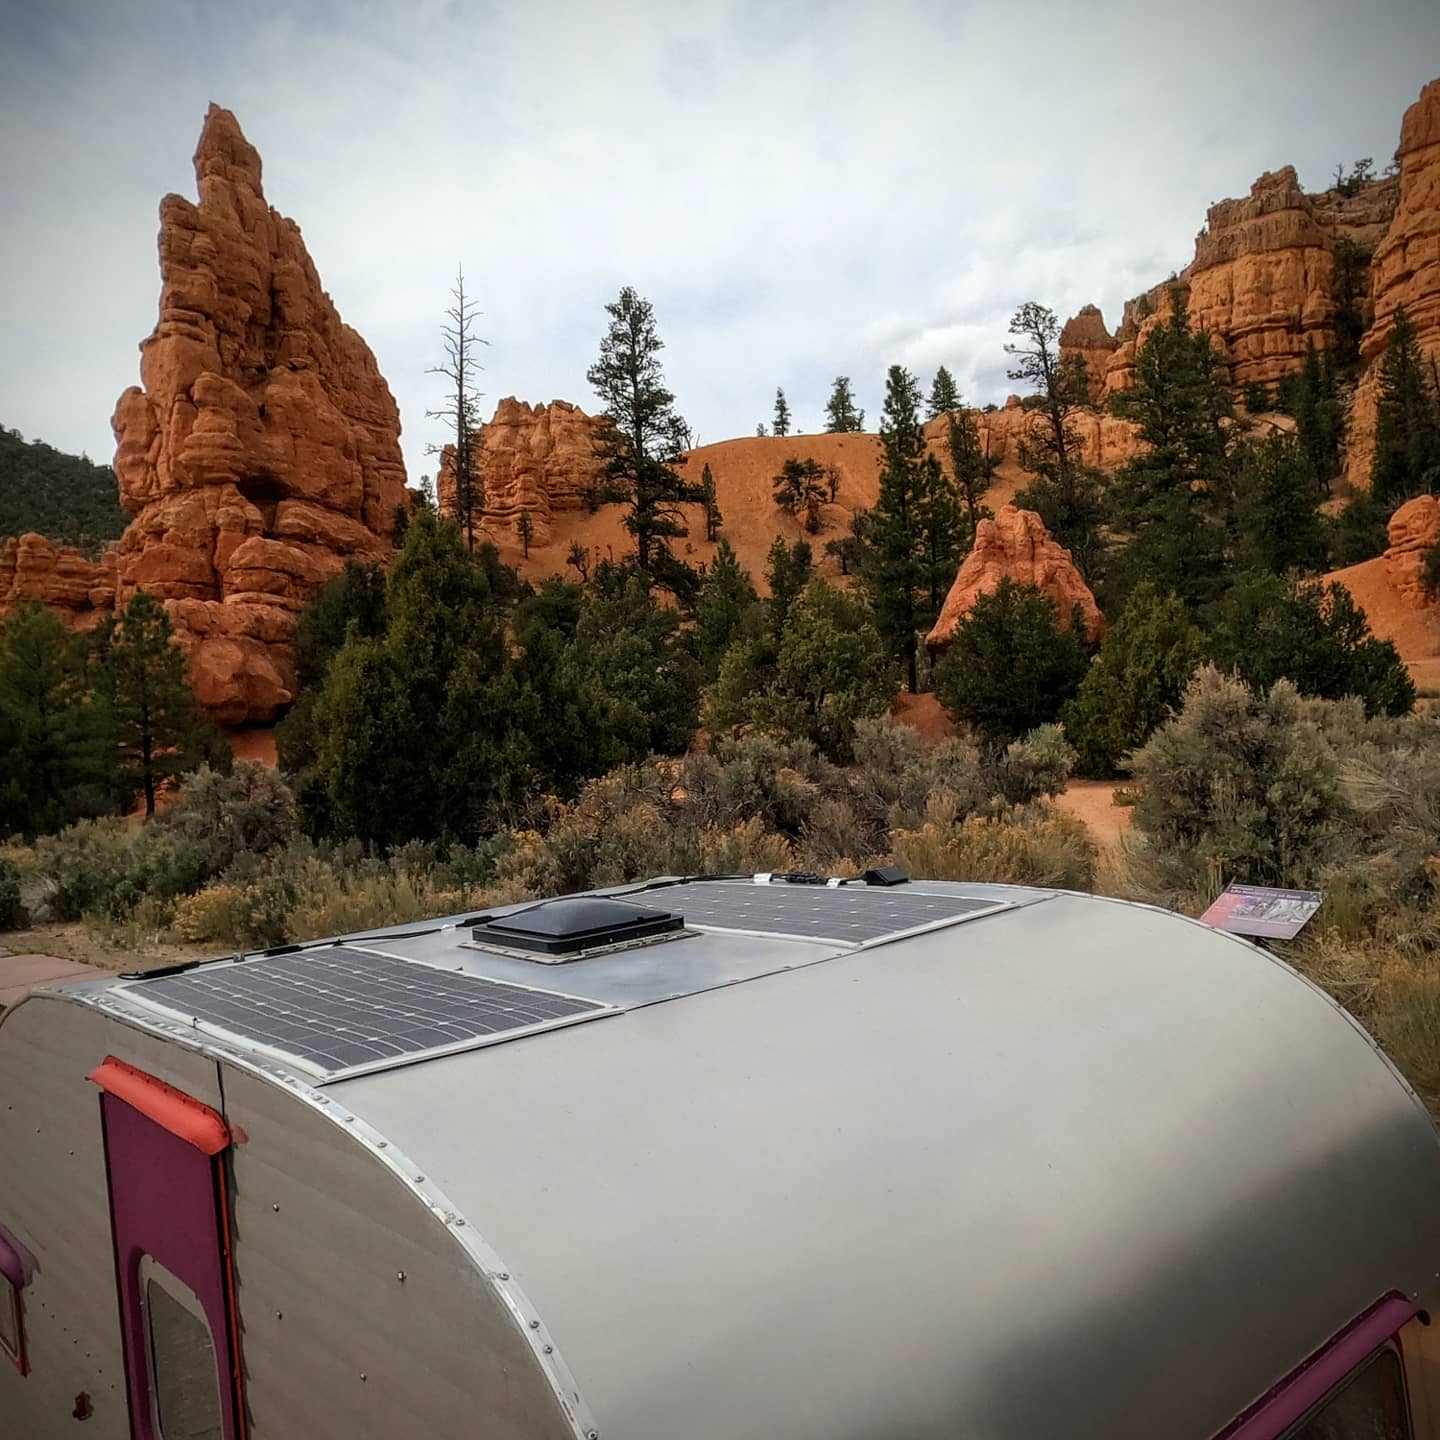
Flexible solar panels have gotten a bit of a bad rap over the years, for a variety of unsubstantiated reasons. We decided to see how well they would hold up to our full-time RV lifestyle -- 16K miles of travel per year, extreme weather/wind conditions, constant use, and installed on a vintage aluminum roof.
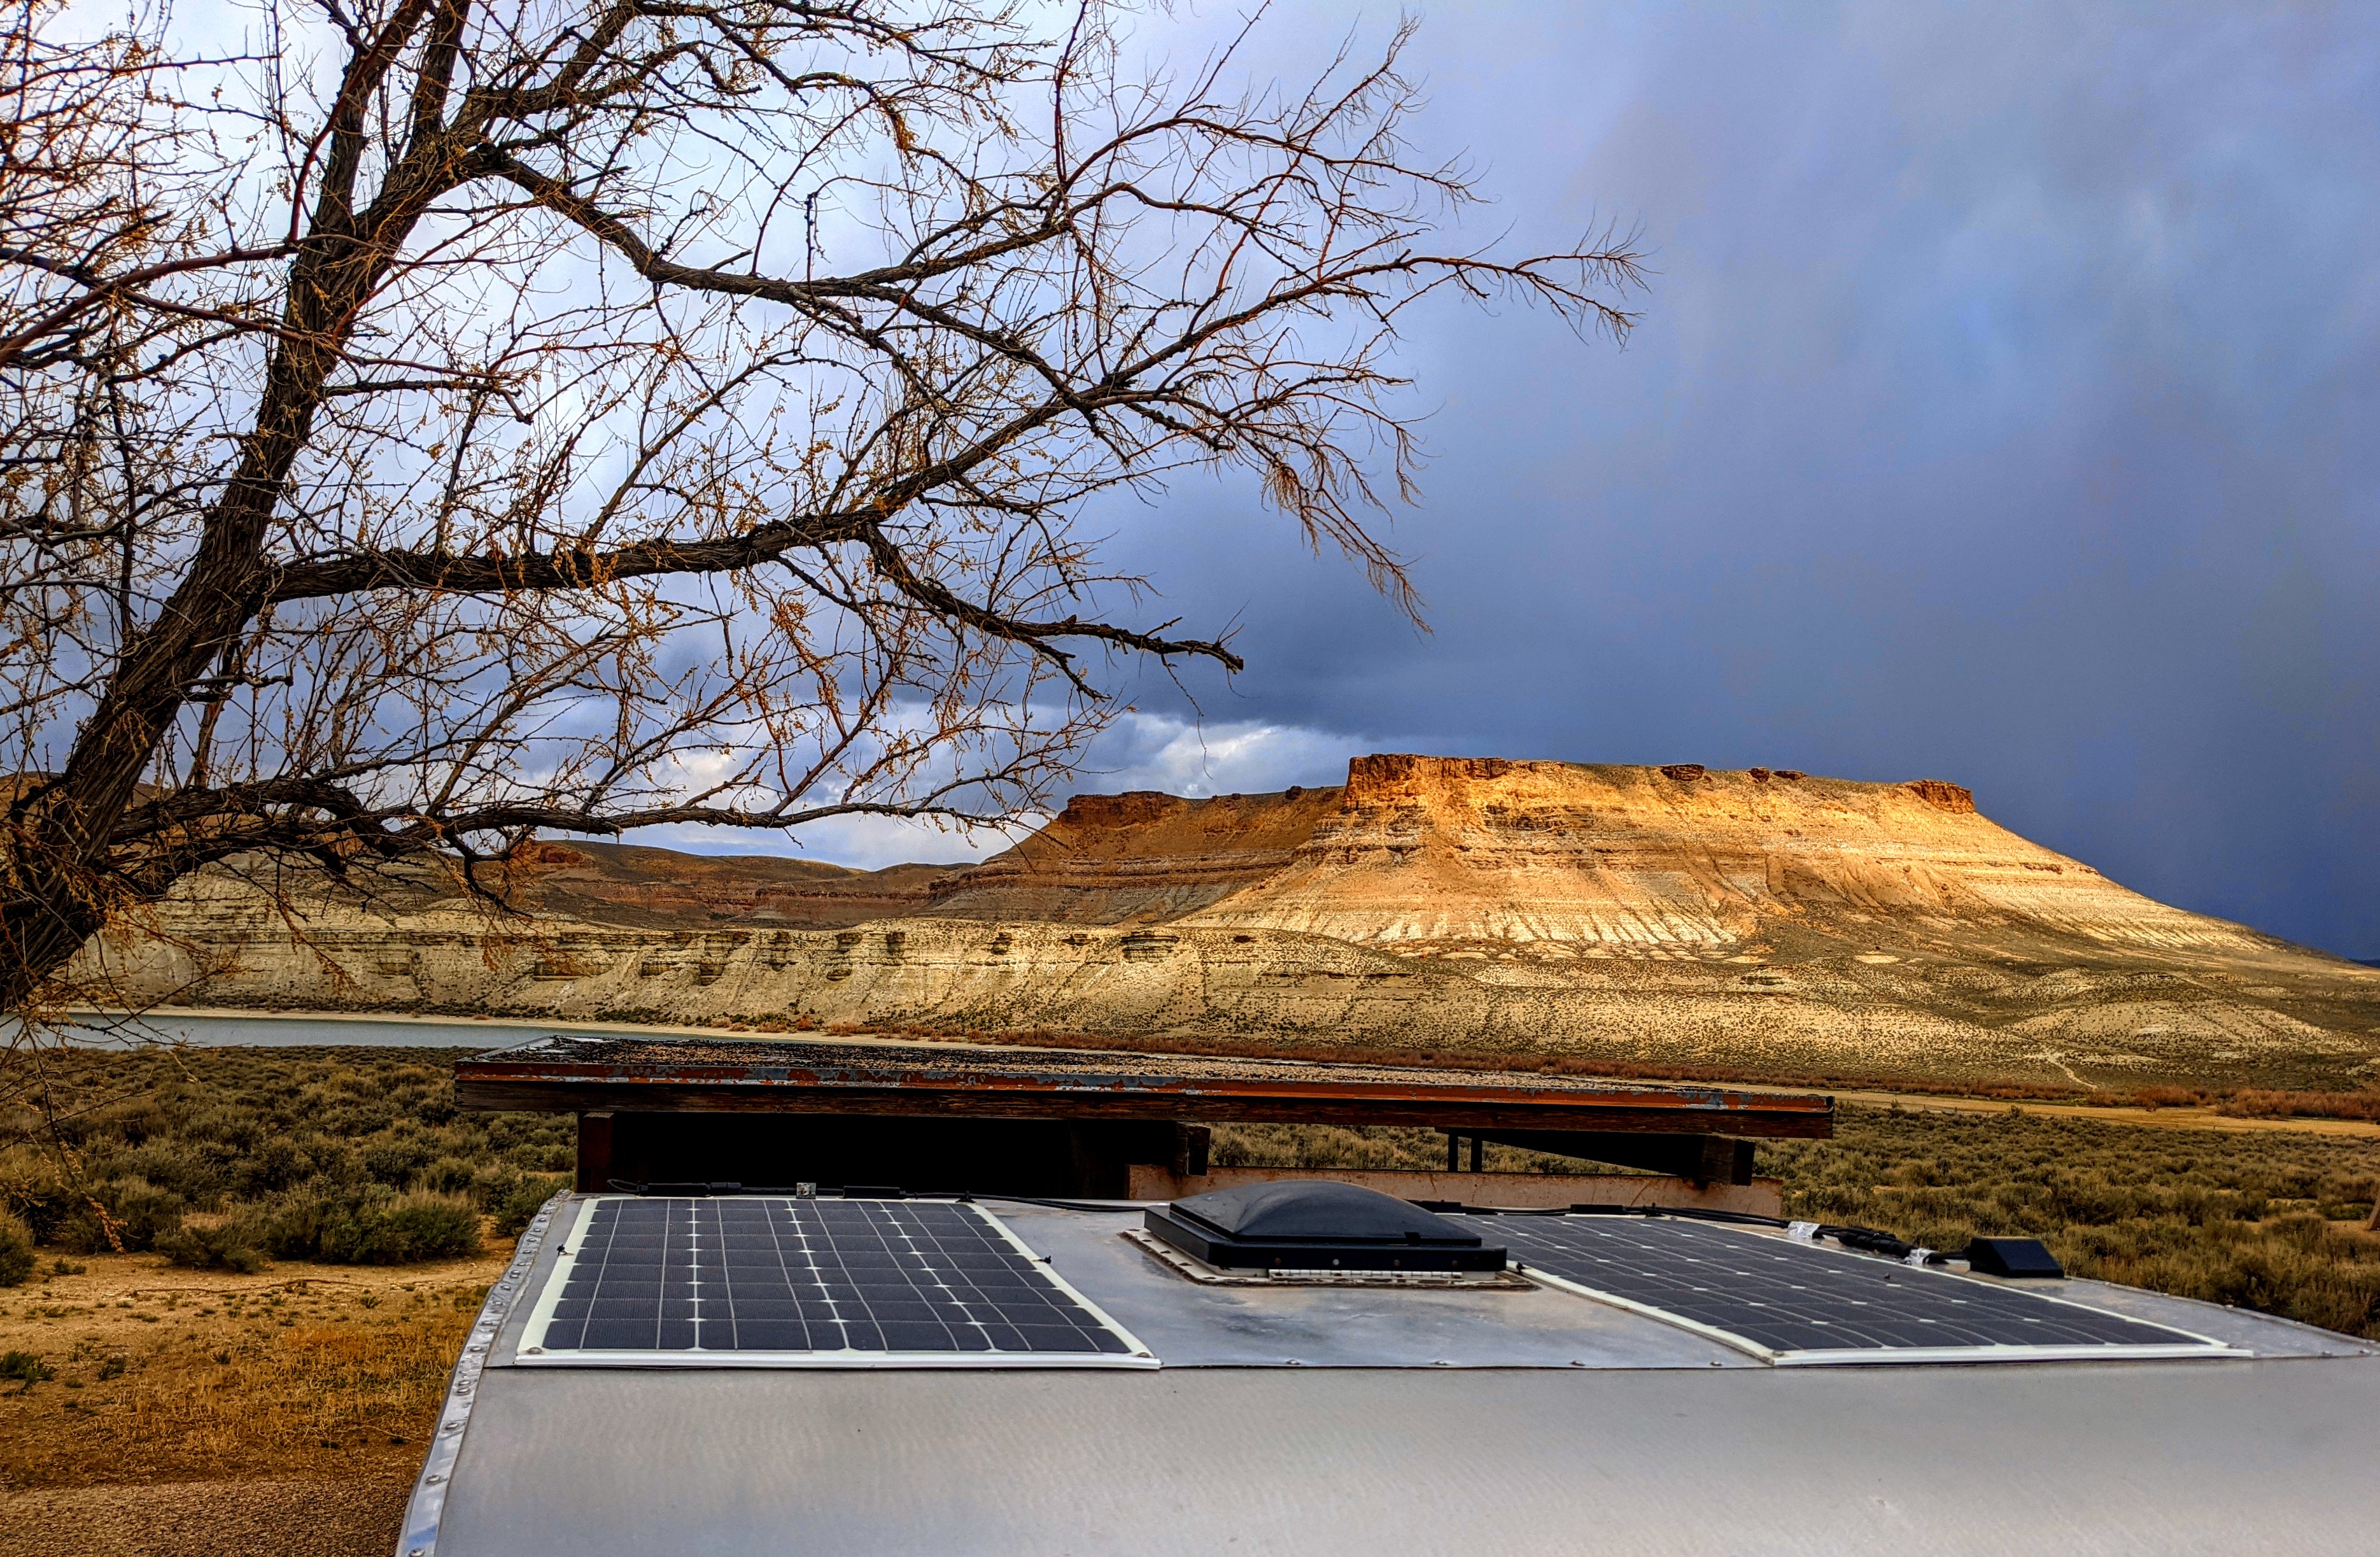
We chose two 100W Flexible Solar Panels mounted on the top of our vintage camper for several reasons. Our 1957 Sportcraft travel trailer has stood the test of time, as it has crossed the continent 12 times and logging over 150K miles (just with us mind you), but weighing down the roof with the weight of rigid panels was a concern. At about 4 pounds each, flexible panels were a no brainer. Installation is very straight-forward and we chose a hybrid method of stick down (with 3M VHB tape, aka Eterna-Bond) and screw down (stainless steel screws). Since we personally replaced each and every one of the 973 screws on our trailer during its renovation, we felt confident in our sealing method (Lexel clear sealant). We simply weren’t worried about putting a few more screws into the metal/wood structure. There are some other great ways to install flexible panels, and we reference a few of them in our The Ultimate DIY Guide to Off-Grid Solar.
We connected the 2 flexible panels in parallel, vs series, using Y-branch connectors, because we often camp in shaded campsites. Parallel offers an advantage in this situation because if one panel is shaded, the other will still operate effectively. While a series connection would perform better at overcoming the 15 to 20-foot run of DC wire between the panels and charge controller, minimizing the loss of power to resistance, it does not perform well in partial shade. If one panel is shaded the other simply won’t function -- they each need the other to complete an electrical circuit. We also wanted the flexibility of putting our previous 100W Portable Solar Suitcase into the mix, specifically for those shady campsite situations. In order to just plug this panel in occasionally we had to keep the roof panels in parallel.Overall, the panels look like they just came out of the box, and are performing well. At max full sun, we get about 75W per panel versus the 85W we see from our solar suitcase. This is likely because they are lying flat rather than propped up at the optimal angle to the sun. Regardless, we have rarely seen our battery dip below 70%!
What’s all the fuss about MPPT charge controllers?
Everyone talks about MPPT (Maximum Power Point Tracking) over PWM (Pulse Width Modulation) for efficiency, and for years we didn’t believe that it would make that much of a difference in small systems like ours. But we figured that we’d see what all the fuss is about, especially since Renogy makes a smaller profile version that was perfect for our small solar cabinet – the Rover Elite MPPT, 40A Charge Controller. It has made a difference; let’s talk about why.
The voltage range of our panels is between 15V and 21V depending on the availability of sunshine, time of day, angle to the sun and atmospheric conditions. Our LiFePo battery needs a charging voltage between 13.5 and 14.4V, so the charge controller drops the voltage coming from the panels to match the battery. On a PWM charge controller, the extra voltage from the panels just gets dissipated as heat – slowly and safely. However, the MPPT charge controller turns that extra voltage from the panels into charging current (amps) for the battery.
On our system we can monitor the panels via the BT-2 Module and the DC Home app; we can see the voltage and amps from the panels, but it also shows the charging voltage, reduced to match the battery, and the charging amperage, increased to boost the battery. While this bump is going to be more significant with a bigger system, even with our tiny system we enjoy the increase in efficiency.
What’s so “smart” about this LiFePo Battery?
It’s rare that you can double your capacity by changing out your one battery. We chose a 100Ah LiFePo Smart Battery for this upgrade. It was easy to install, and so far, it’s been awesome. It charges up quickly, and with nearly 1152 available watt hours (to the 80% depth of discharge), we can charge and run our power hogging video production laptop and still have plenty of energy left over to run our lights, vent fan, and a few household appliances. It’s wonderful when you can meet the energy demands of both your work and your life with just one battery. The “smart” part of this battery is not something we have utilized because it only comes into play when connecting multiple batteries in parallel; we have just one. In the case of multiple, it helps balance the voltage among the other batteries in your bank.
We don’t need a battery monitor...or do we?
You know when you’ve spent a few years living a certain way, then you make a small change that makes a big difference and you have no idea how you lived without it? Well, all we can say is that we have no idea why we didn’t get a 500A Battery Monitor sooner. Honestly, it might be one of the best things we’ve purchased for under $100. We’ve spent the last few years monitoring the battery with just the BT-1 Module via the old Renogy app. It was fine, but it never really gave us a completely accurate reading of the battery’s percentage of charge. With this new battery monitor, once you’ve set its upper limit, it measures amp hours (AH) both in and out. It’s small and simple to read, giving you just enough information to keep tabs on your system.
If you like to nerd out a bit more, use it in tandem with the BT-2 Module and DC Home app. You can use these two tools together to calculate the load on your system. We can see the wattage that is coming in from the panels with the app, as well as see the watts going out of the battery when it has a load on it. By subtracting the battery monitor wattage reading from the DC Home app panel output reading, we can estimate the load on our system. The battery monitor was very easy to install, which we detail in the video above.
Should we upgrade our inverter too?
We contemplated upgrading our inverter to a 1000W, but we realized that we never come close to maximizing the load on our 700W Pure Sine Wave Inverter. If we run all of our AC appliances at once, we may reach 400-500W. Larger inverters draw more power just by simply being turned on, and we weren’t sure that a 1000W inverter would even fit into our very small solar cabinet, so we left well-enough alone and integrated our 700W into the new system. It plays well with the new components, the fan is so quiet it’s barely noticeable, and after 3 years with this inverter, it is still working seamlessly without a single problem.
After almost 9 years of living on the road with solar, we finally have a system that exceeds our needs, and solves some of those nagging limitations that we used to accept as just a part of living the roadlife. We’ve proven that we can easily run a 12V refrigerator by making the most of a 30A Dual Input DC to DC Charger which extends our boondocking capabilities, as well as install a state-of-the-art solar system on a tiny vintage camper that doesn’t detract from its retro charm. And if we can do it, then so can you!

In 2012, Shari Galiardi & David Hutchison left behind careers and a comfortable home in North Carolina to travel with the vintage camper trailer they lovingly restored, outfitted with solar, and named "Hamlet." What began as a short break from careers and responsibility quickly turned into a love affair with roadlife. They have parlayed their higher education backgrounds, desire for life-long learning, and thirst for adventure travel into writing, photography, video production, and public speaking gigs from coast to coast. Known to their friends as simply Shari & Hutch, you can learn more about their full-time, solar-powered adventures on their website at freedominacan.com. Or, follow them on Facebook, Instagram, and YouTube as “Freedom in a Can, LLC.”


